Only Professional Edition supports Custom Translations feature.
Use ThingsBoard Cloud or install your own platform instance.
ThingsBoard Custom Translations feature allows you to upload alternative to existing language translations and extend the translation to specific GUI elements on the dashboards.
Remember: having an internalization for the platform implies the availability of custom translation maps for multiple languages. Otherwise, instead of translation {i18n} structure will be displayed.
Using Locale Files
Locale files contain basic list of translations. Their list is constantly expanding.
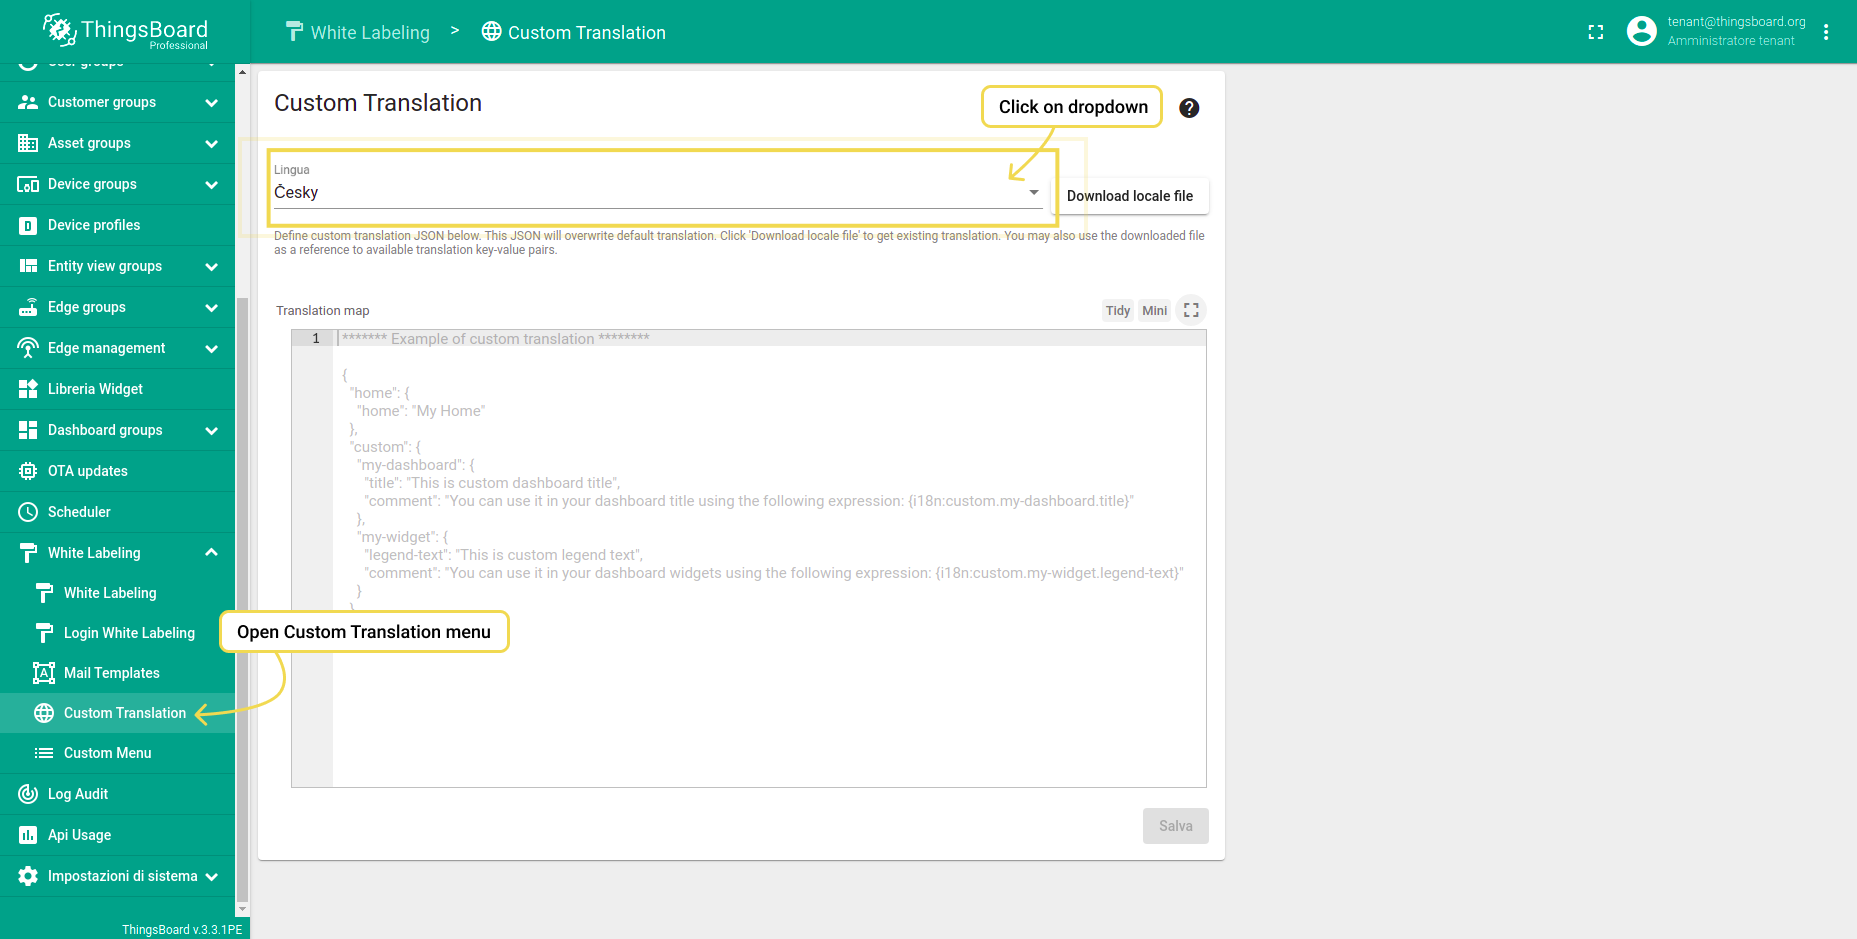
- Step 1. Open Custom Translation menu.
- Step 2. Choose language from dropdown menu. For example, Italian.
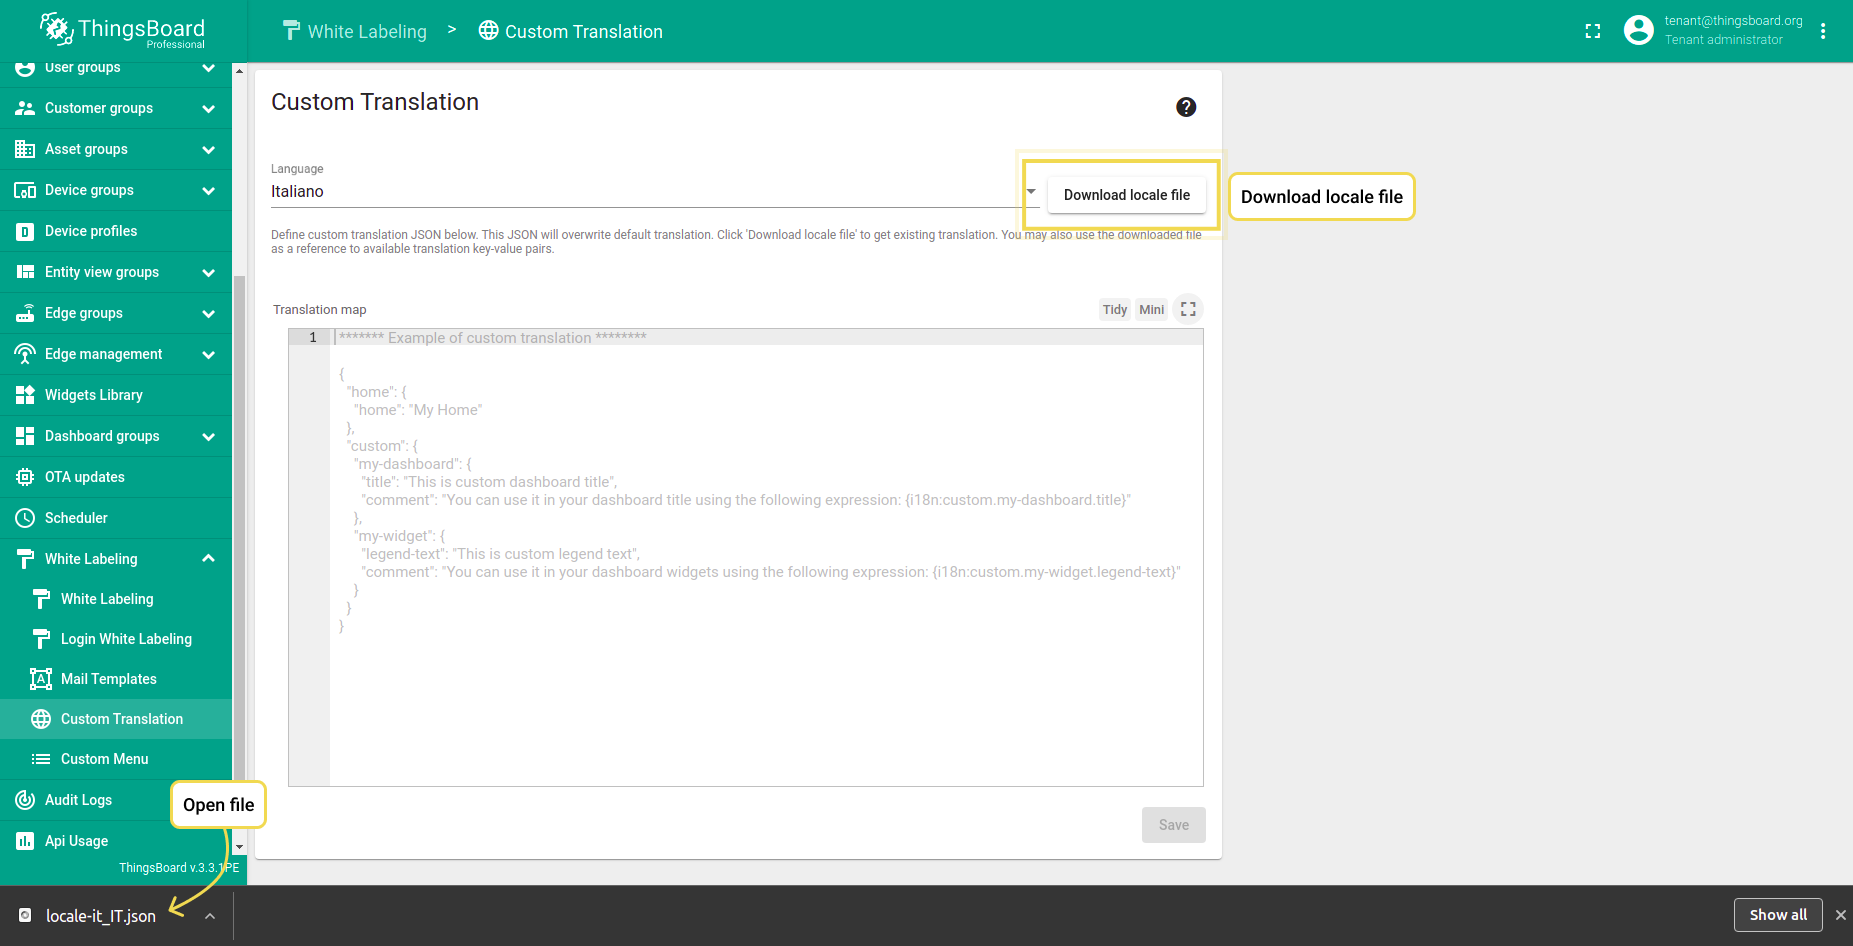
- Step 3. Download locale file.
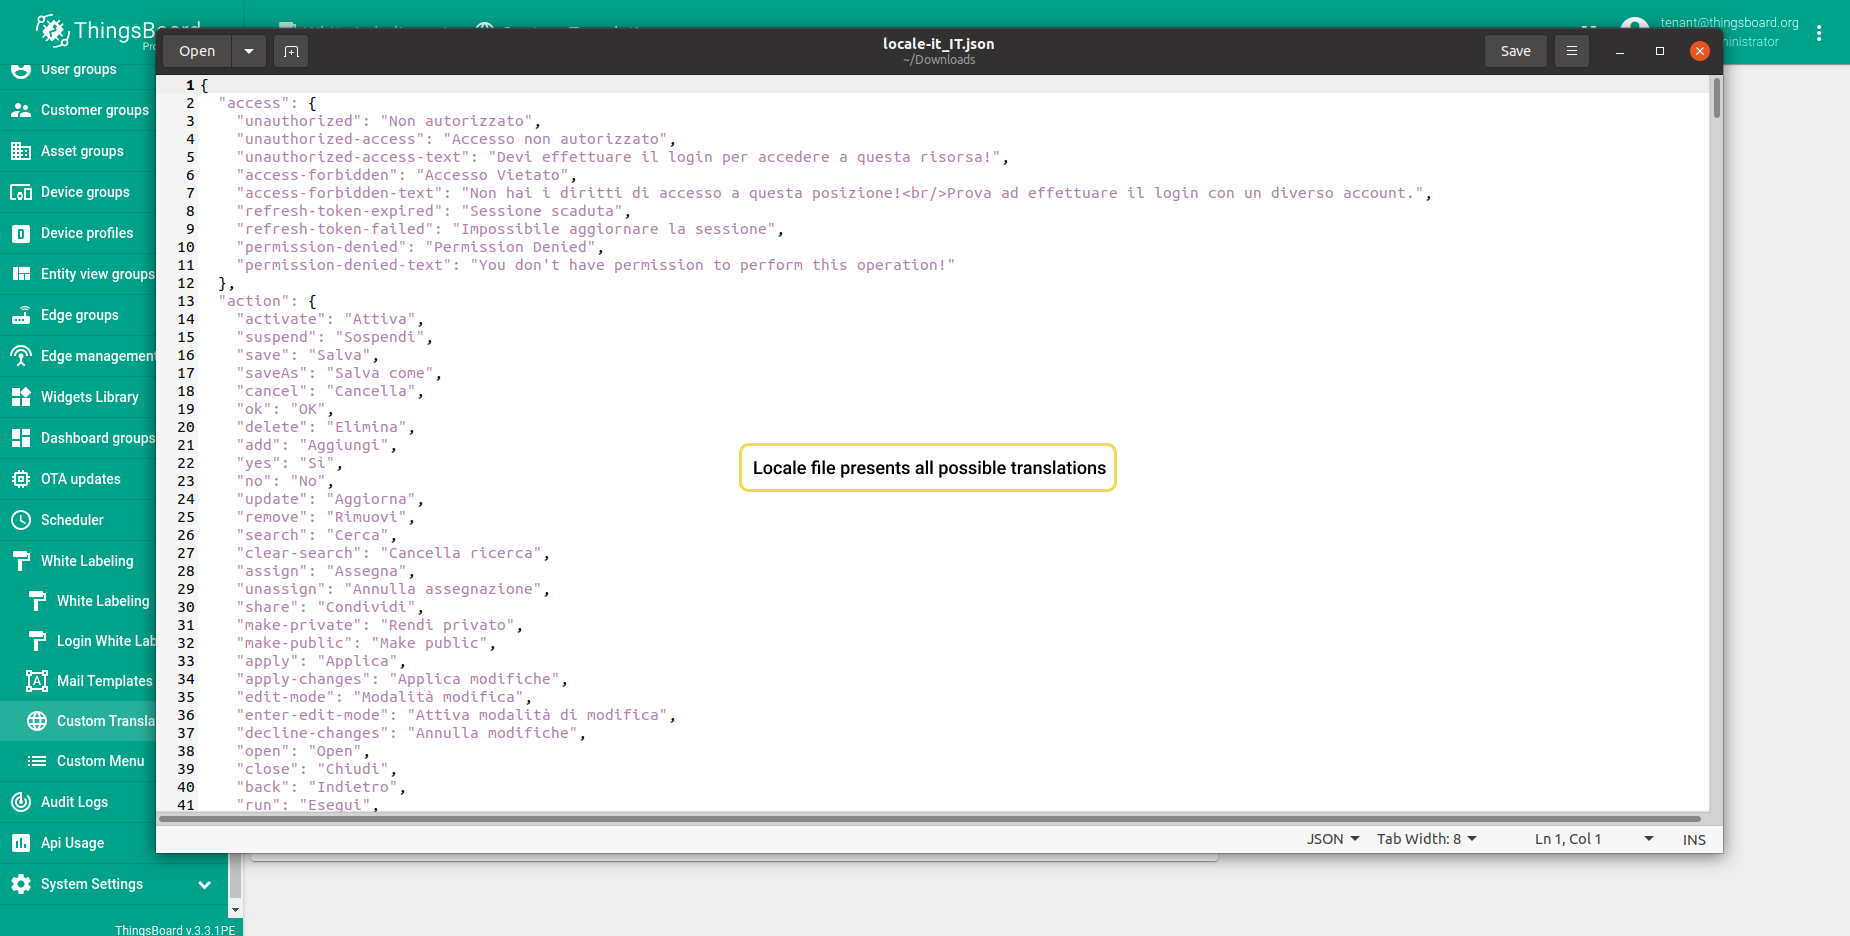
- Step 4. The locale file presents all possible translations for the chosen language.
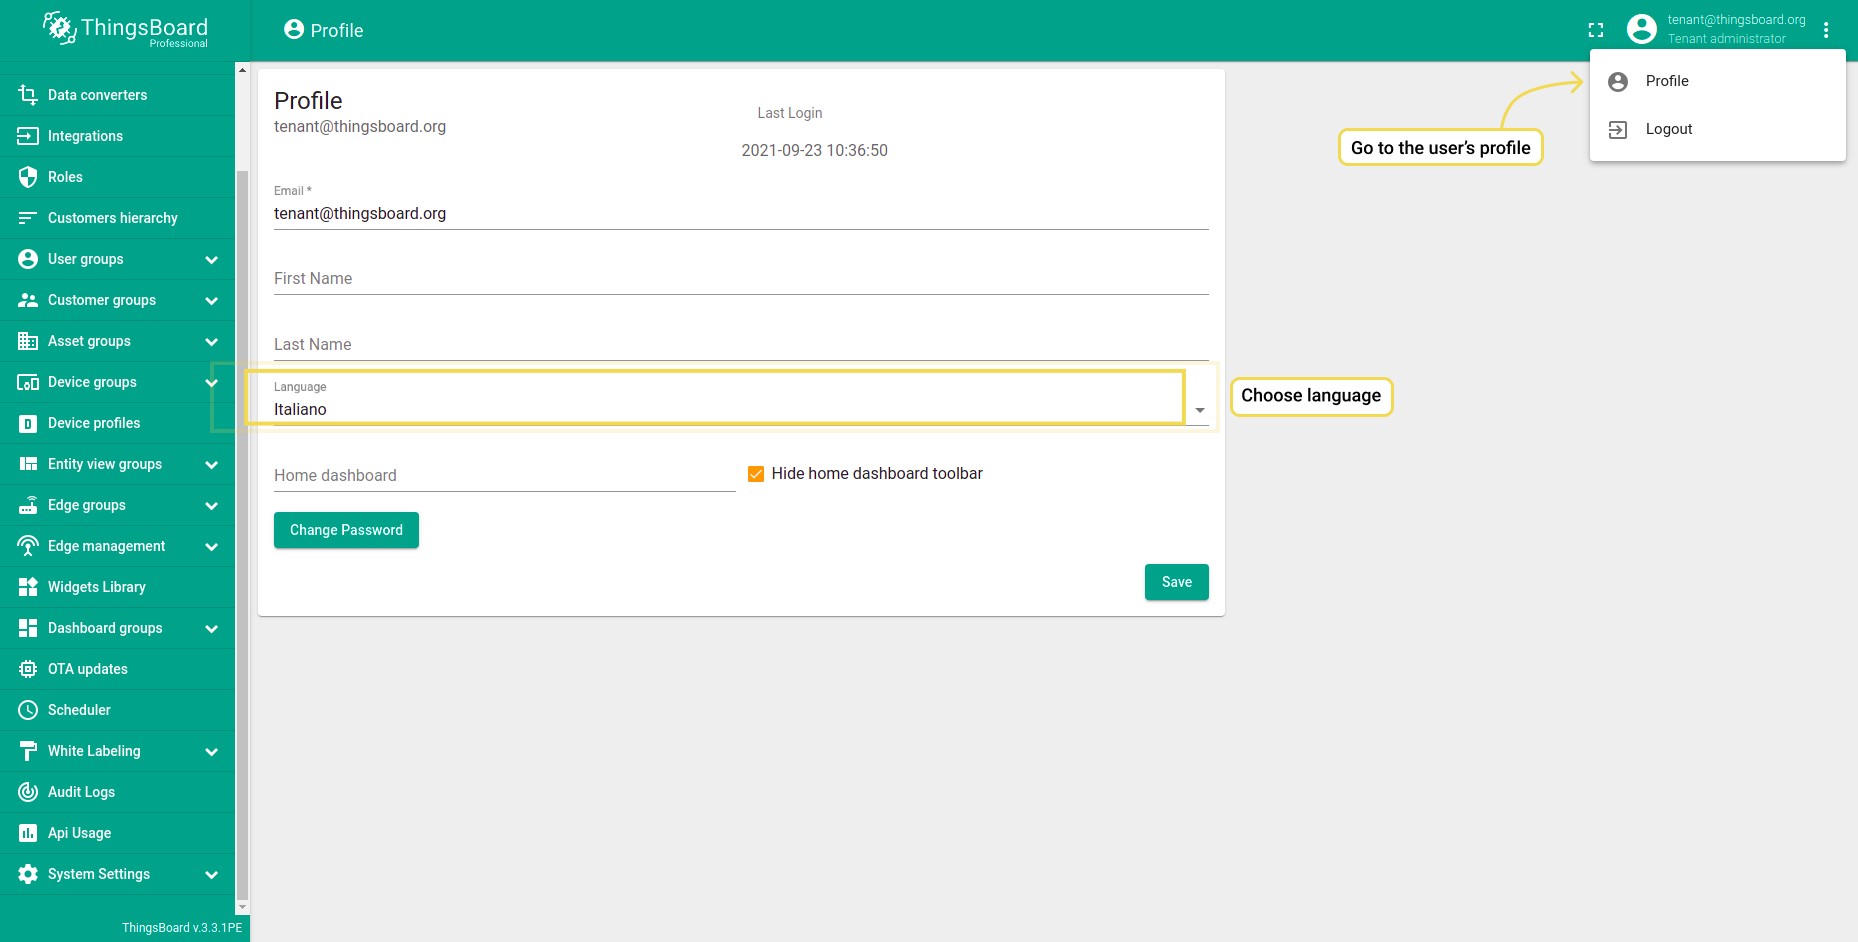
- Step 5. Change language in the User Profile to apply settings.

Custom menu
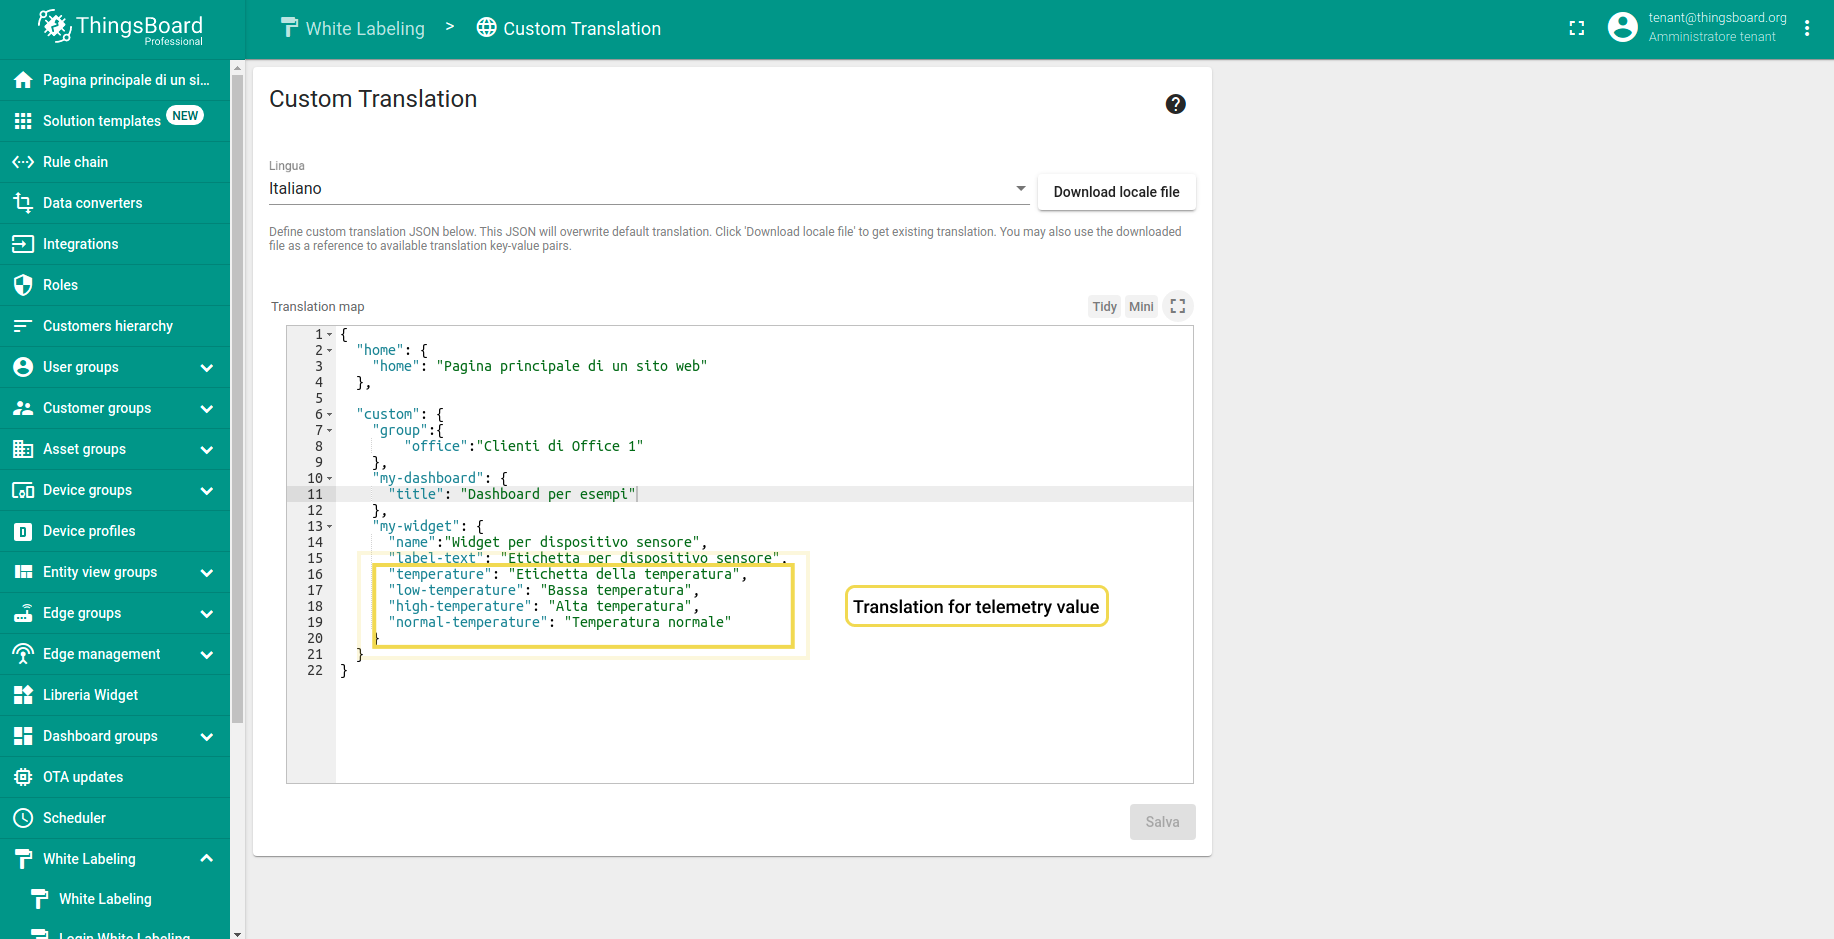
- Step 1. Specify custom translation in the translation map.
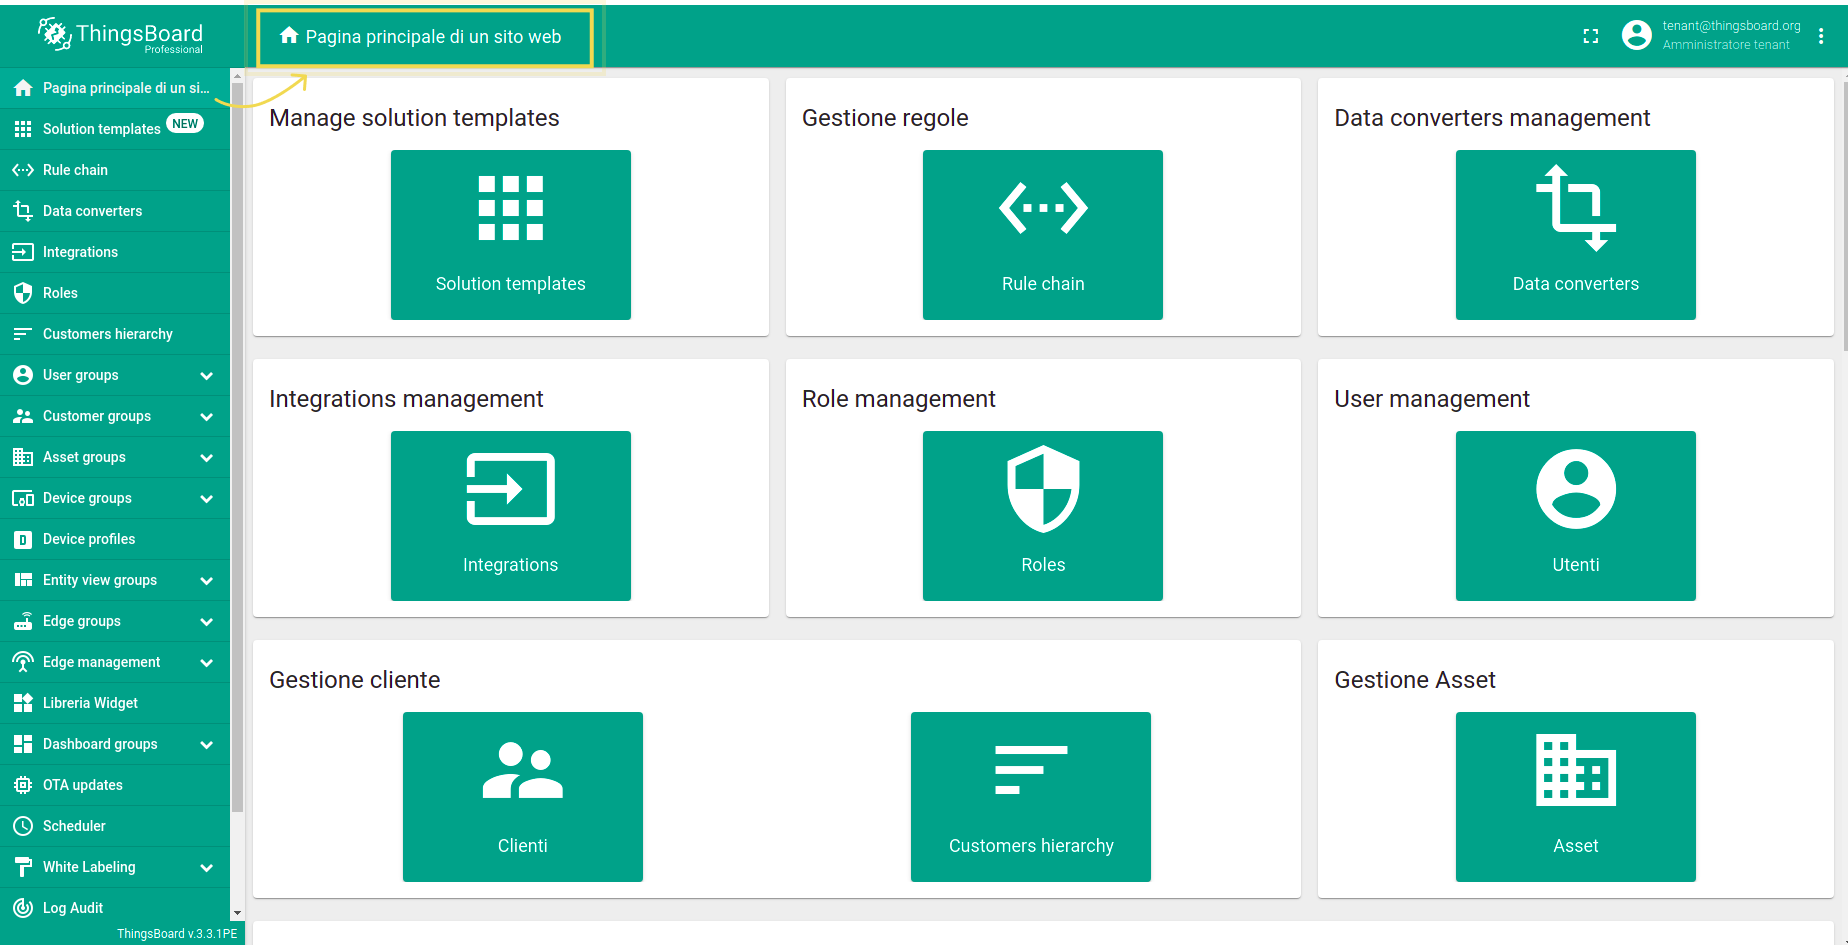
- Step 2. Navigate to the Home page and check translated menu.
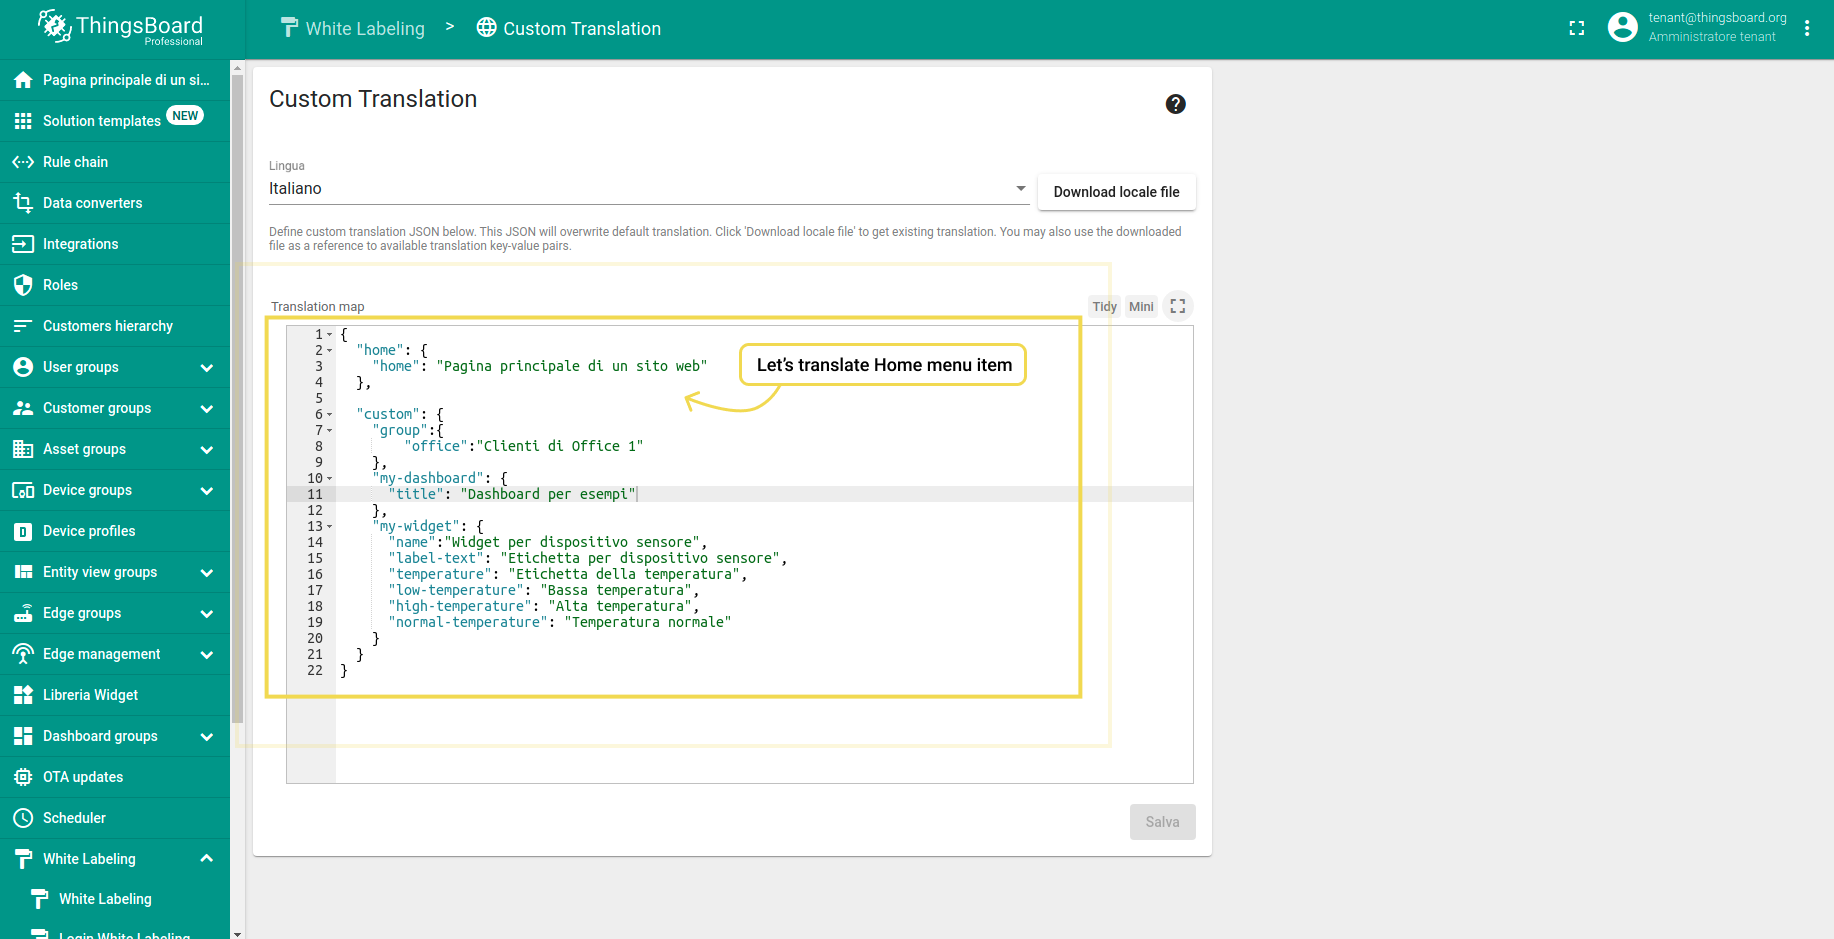
Examples of the custom translation map:
1
2
3
4
5
6
7
8
9
10
11
12
13
14
15
16
17
18
19
20
21
22
{
"home": {
"home": "Pagina principale di un sito web"
},
"custom": {
"group":{
"office":"Clienti di Office 1"
},
"my-dashboard": {
"title": "Dashboard per esempi"
},
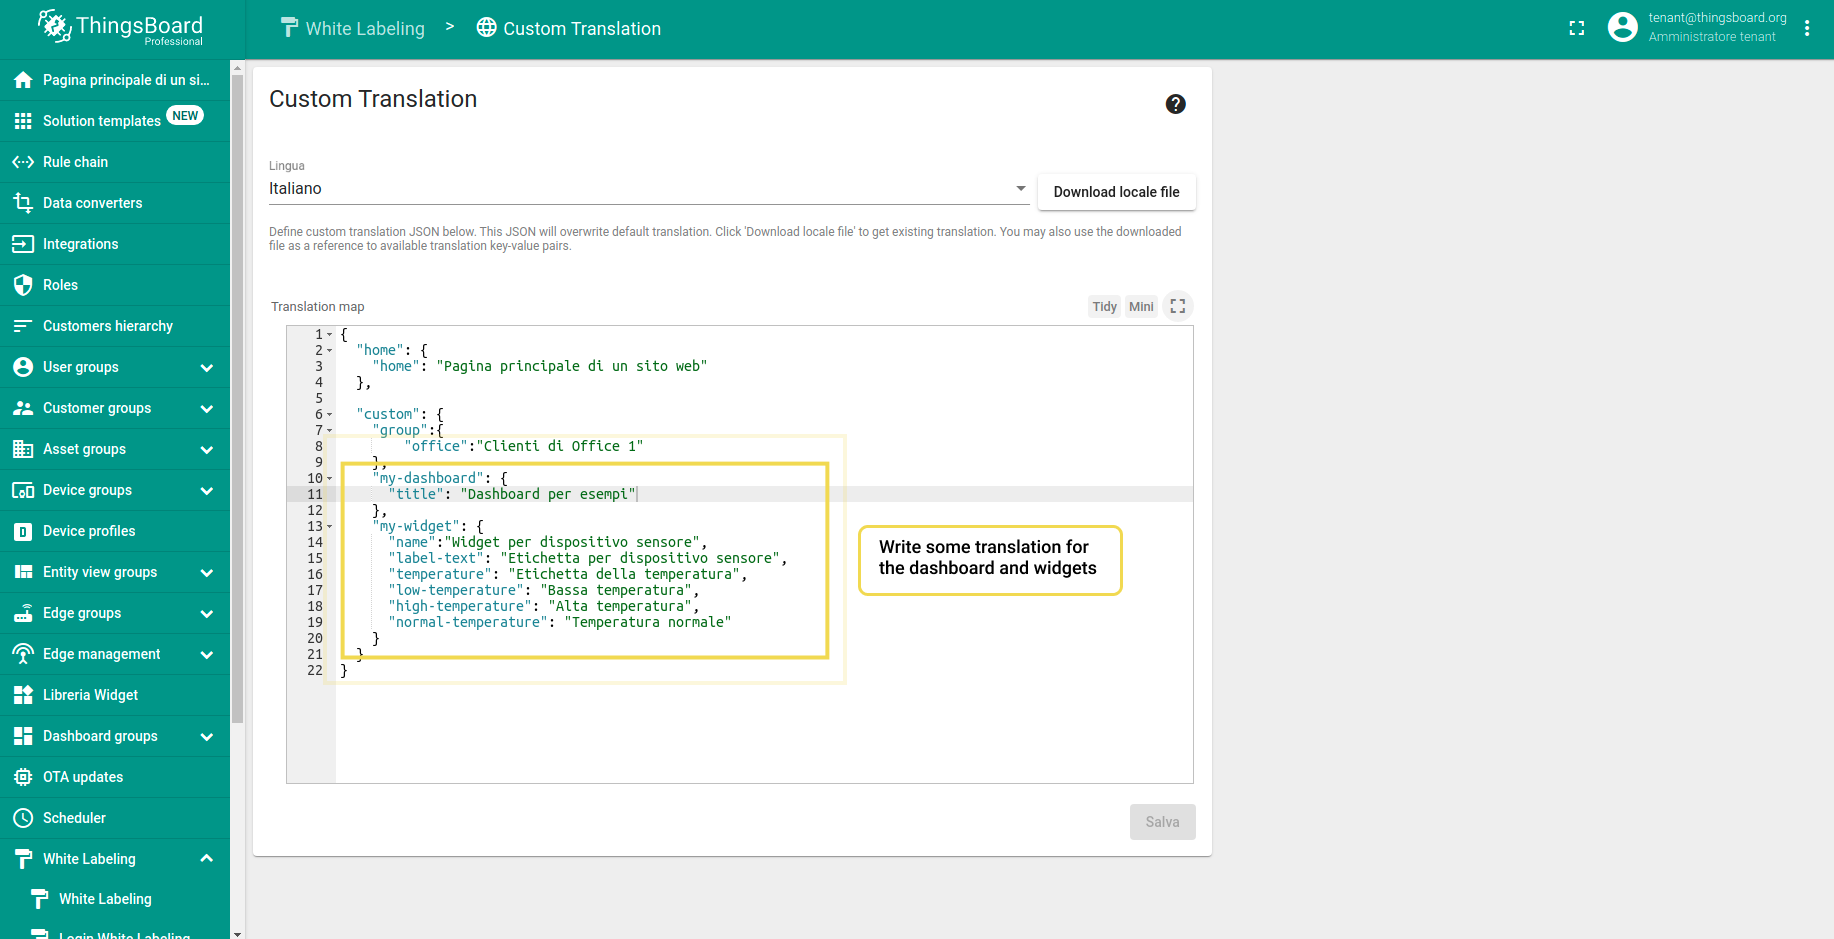
"my-widget": {
"name":"Widget per dispositivo sensore",
"label-text": "Etichetta per dispositivo sensore",
"temperature": "Etichetta della temperatura",
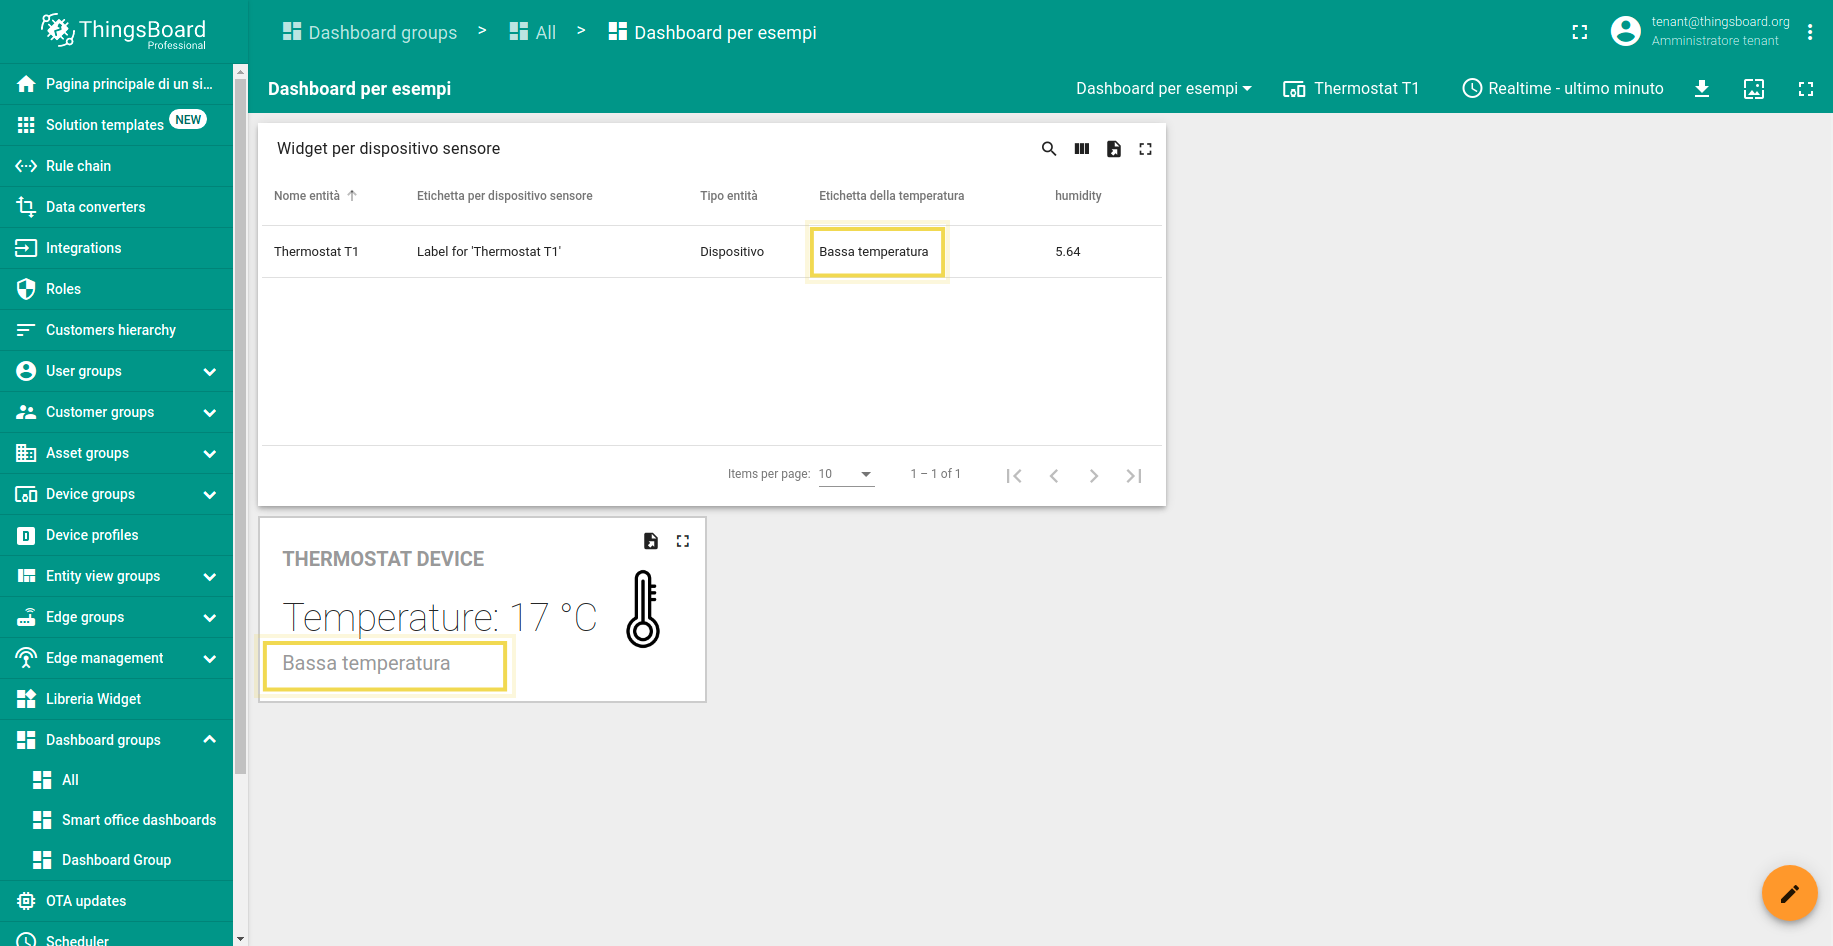
"low-temperature": "Bassa temperatura",
"high-temperature": "Alta temperatura",
"normal-temperature": "Temperatura normale"
}
}
}
Dashboard
- Step 1. Specify new custom translation for the dashboard and widgets.
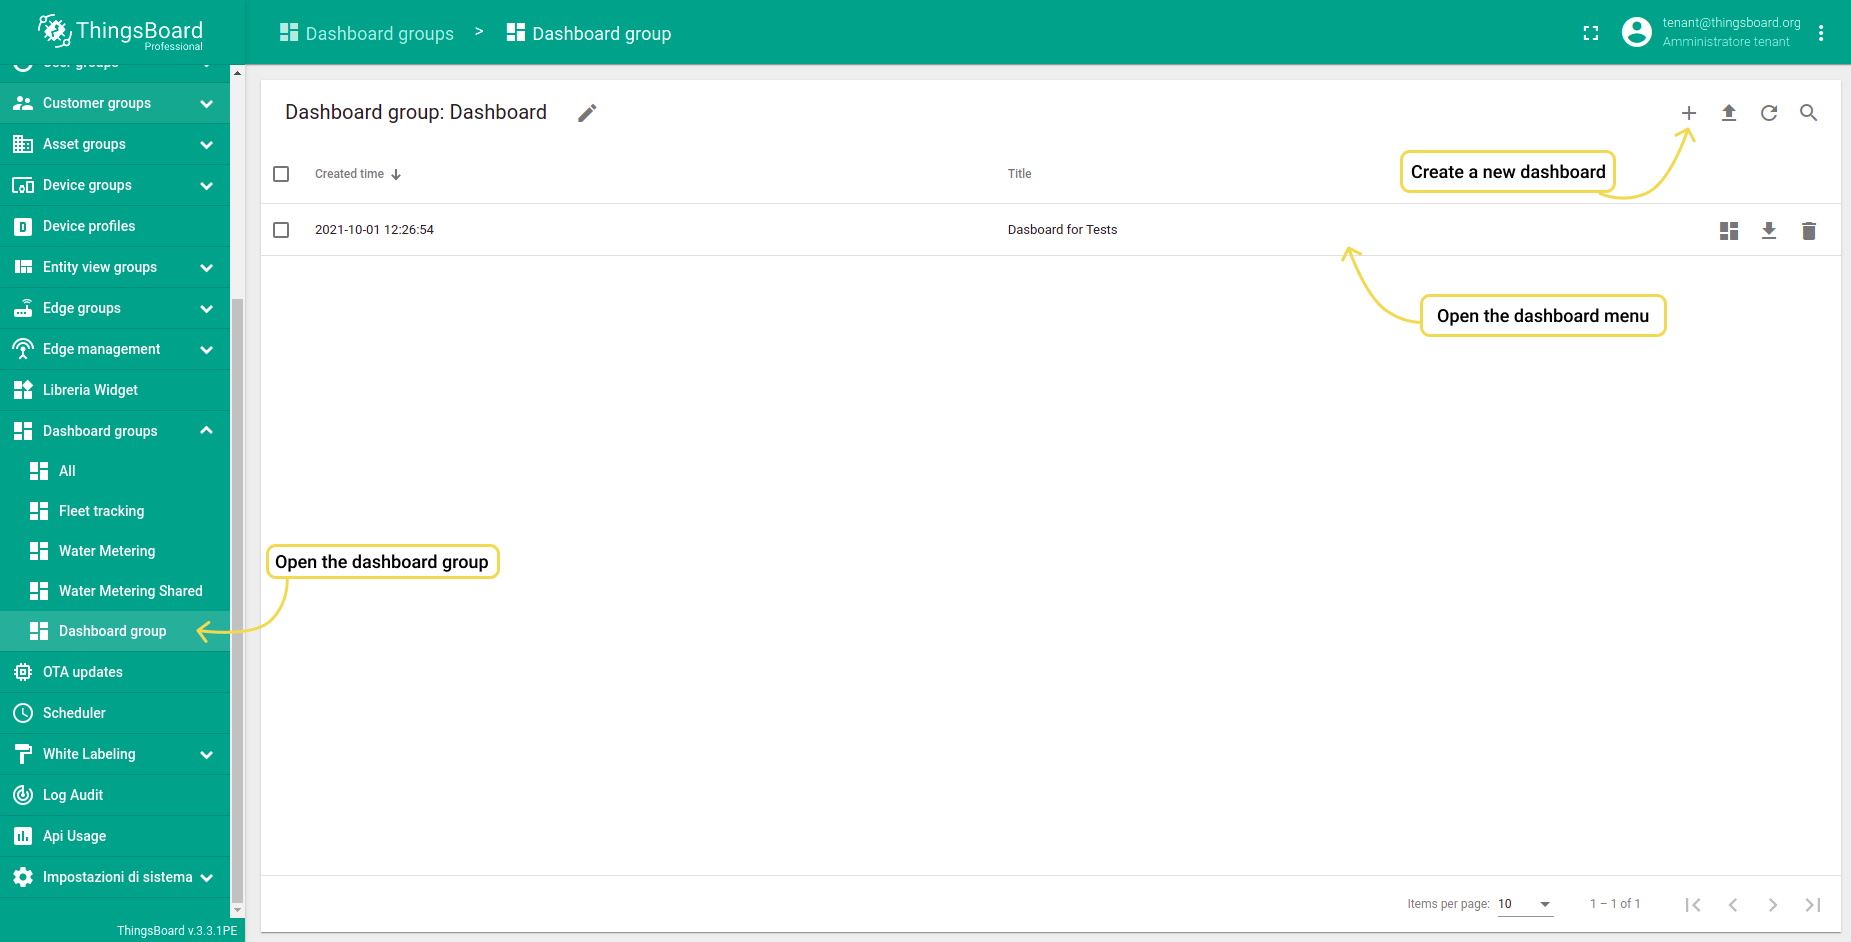
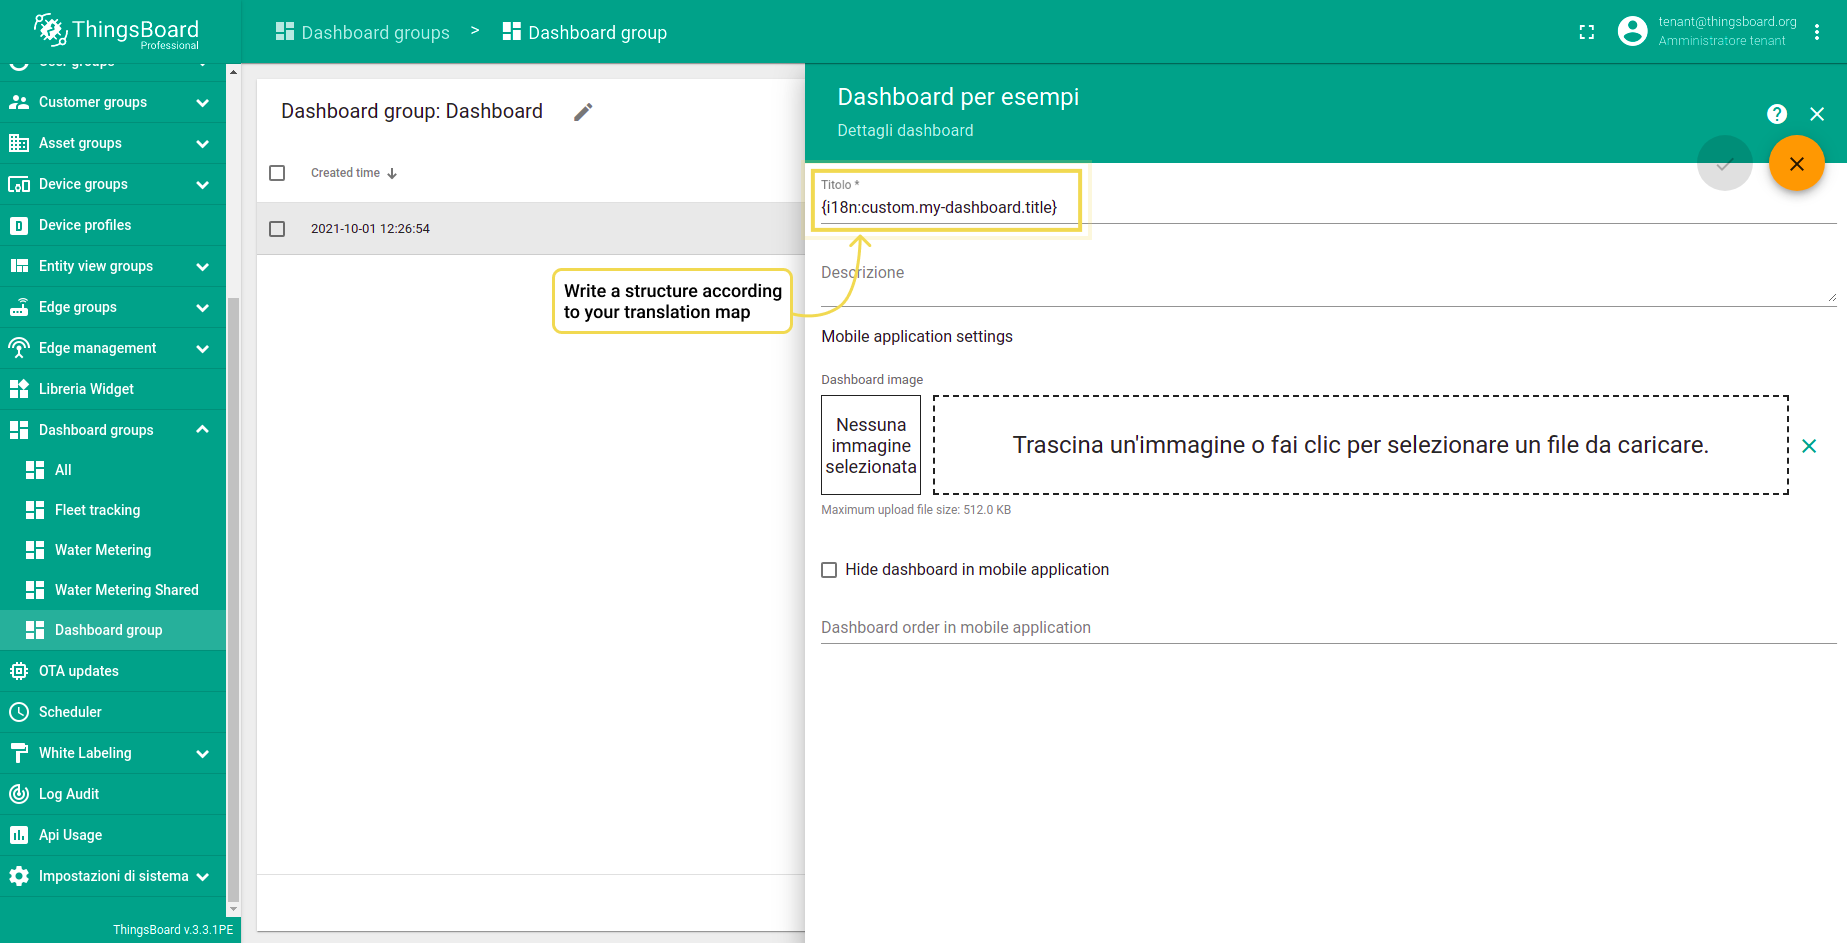
- Step 2. Go to the Dashboard page. Create a new dashboard or choose an existing one. Open the dashboard menu.
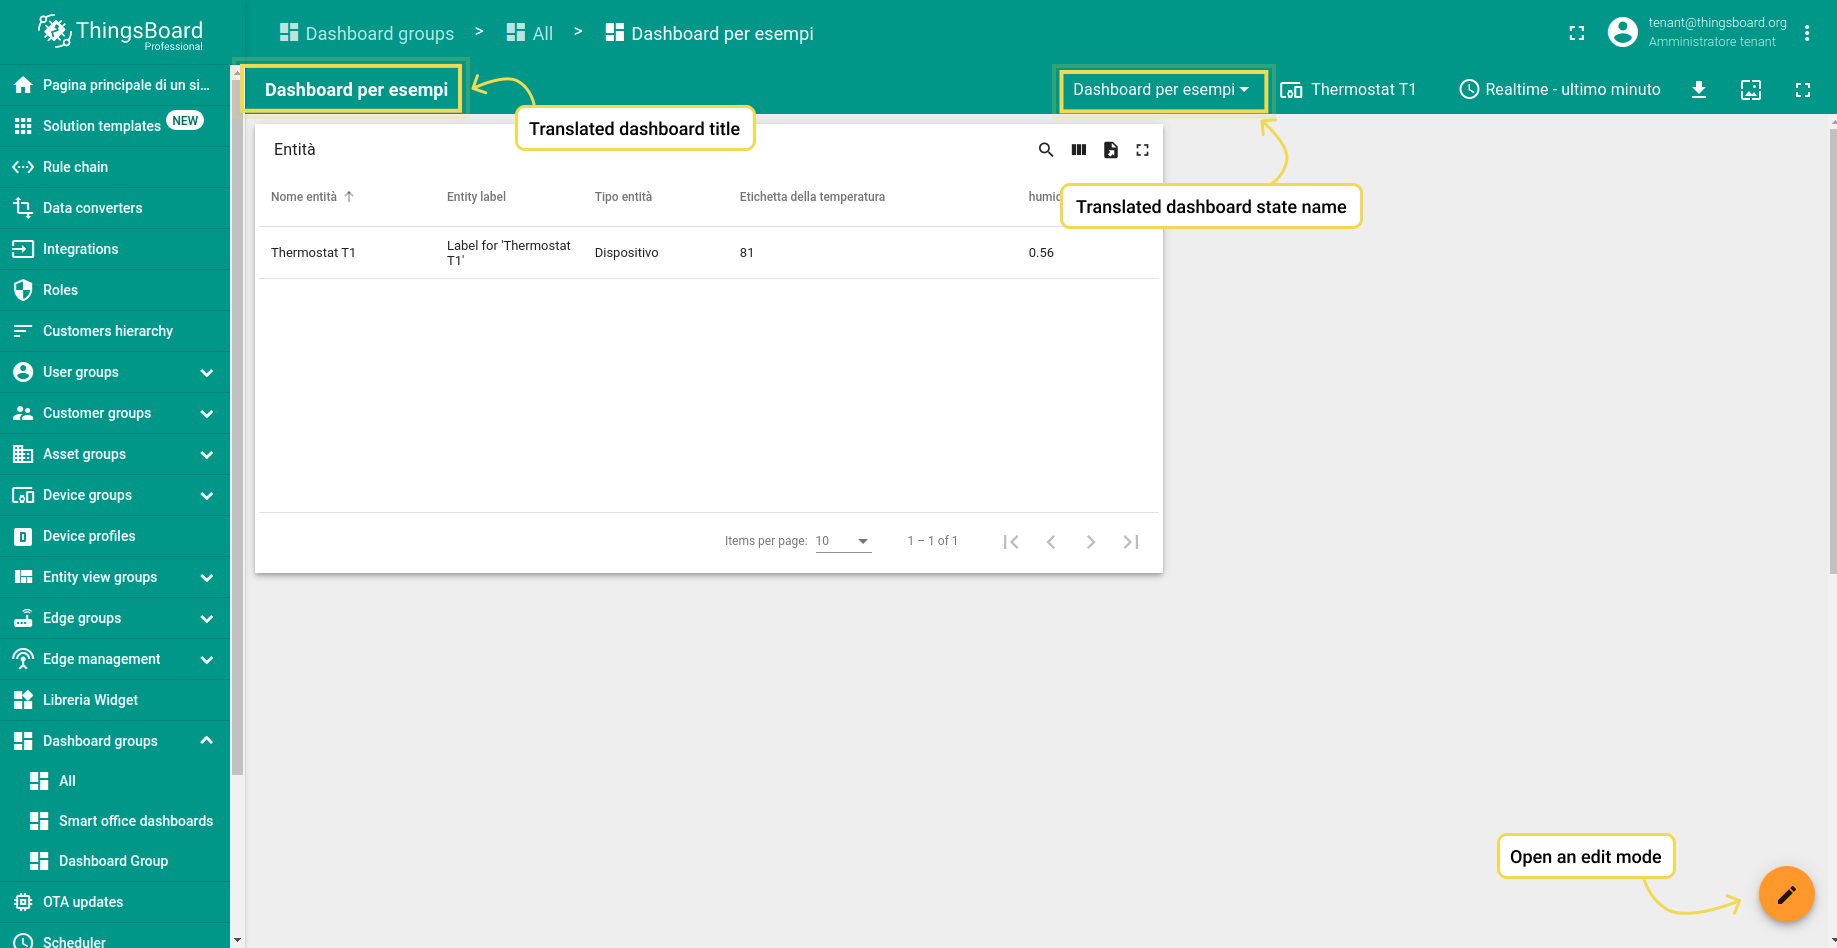
- Step 3. Translate dashboard title. Note the required syntax: {i18n:custom.my-dashboard.title}.
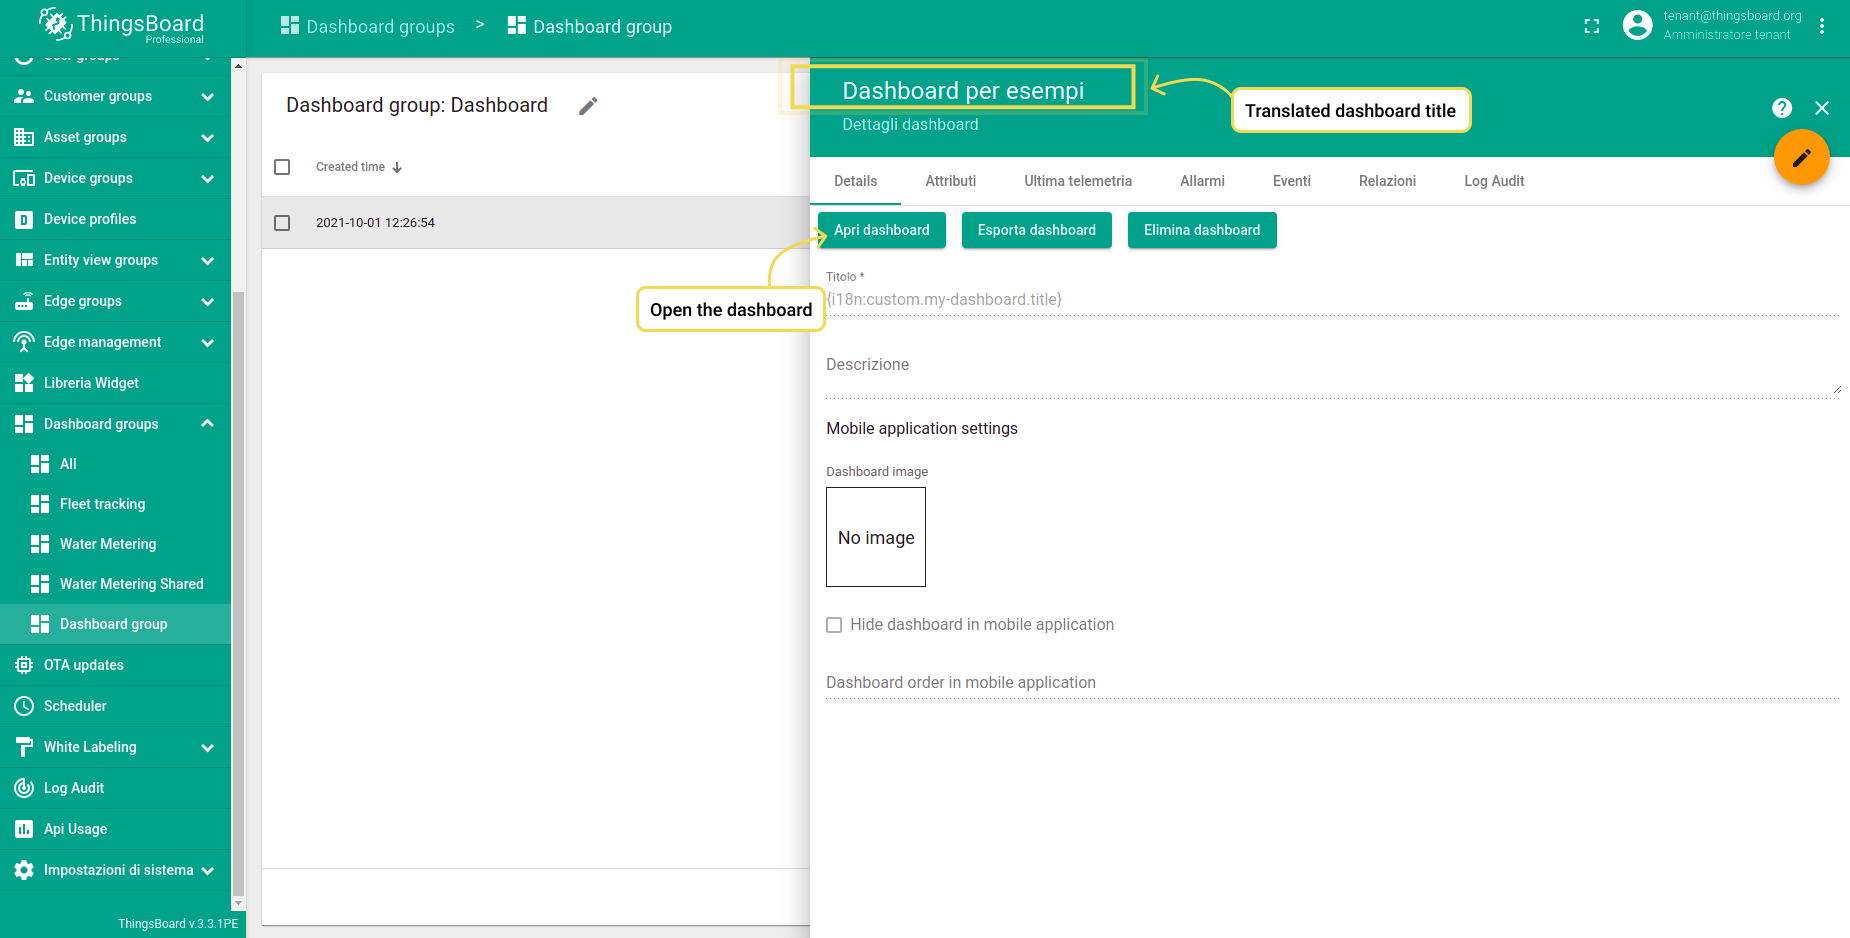
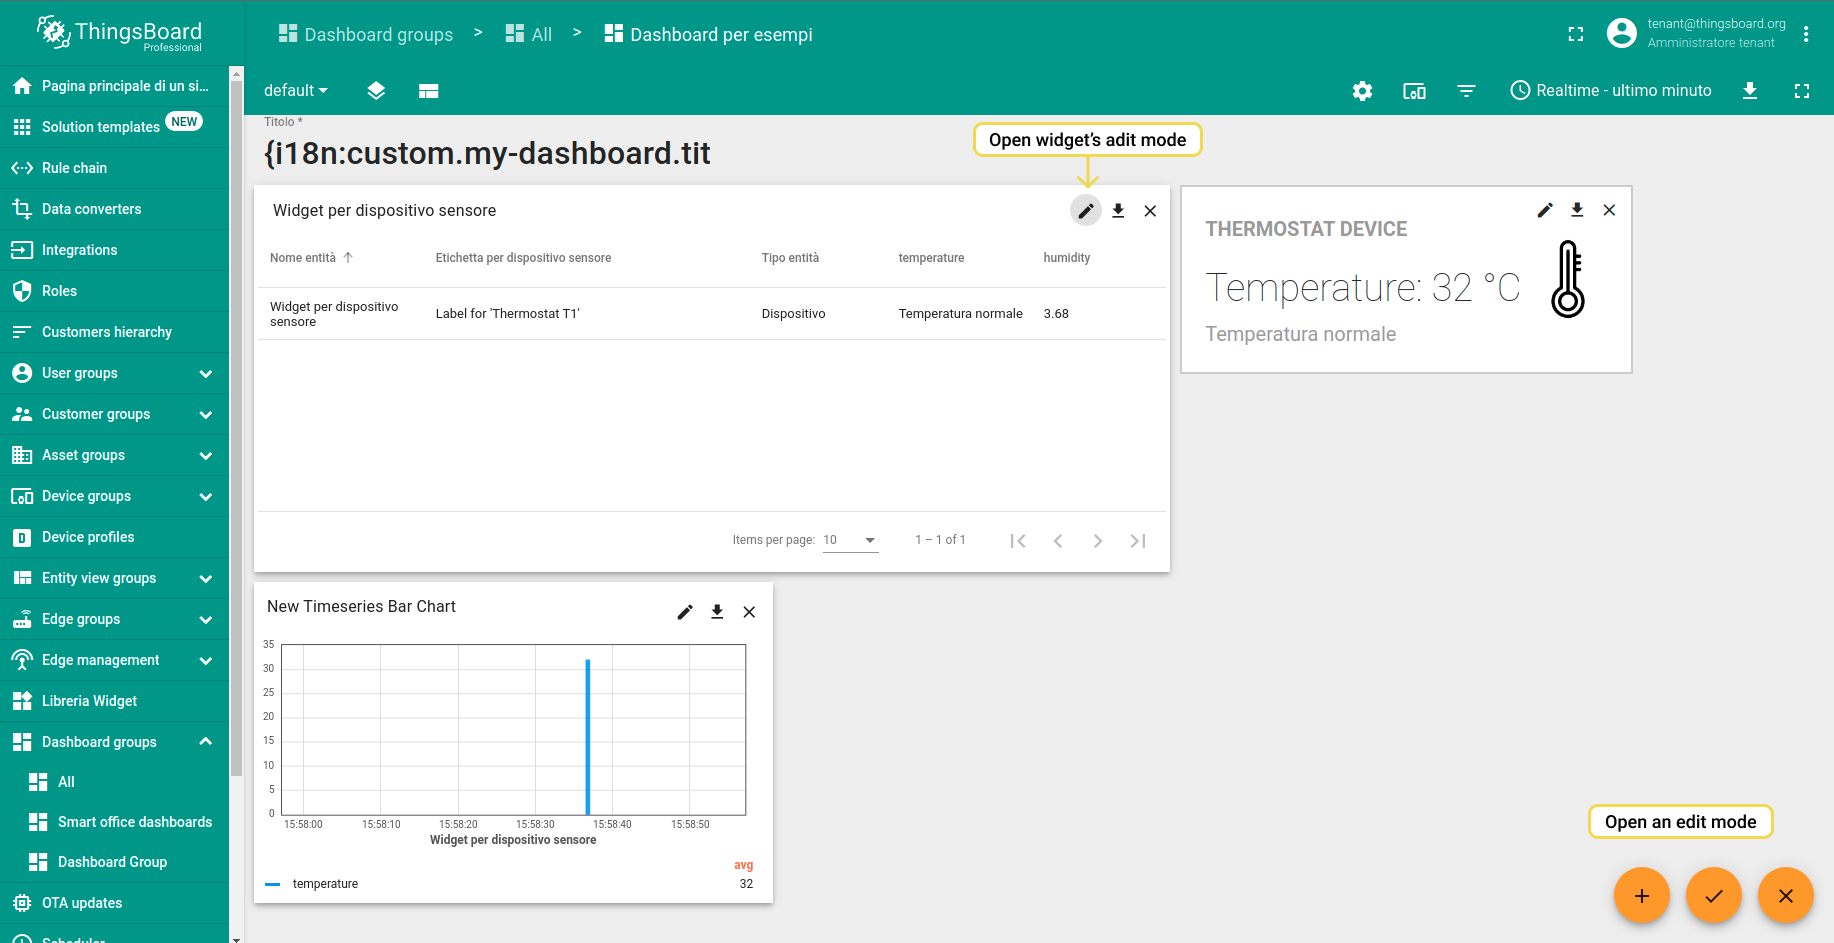
- Step 4. Check the translated title.
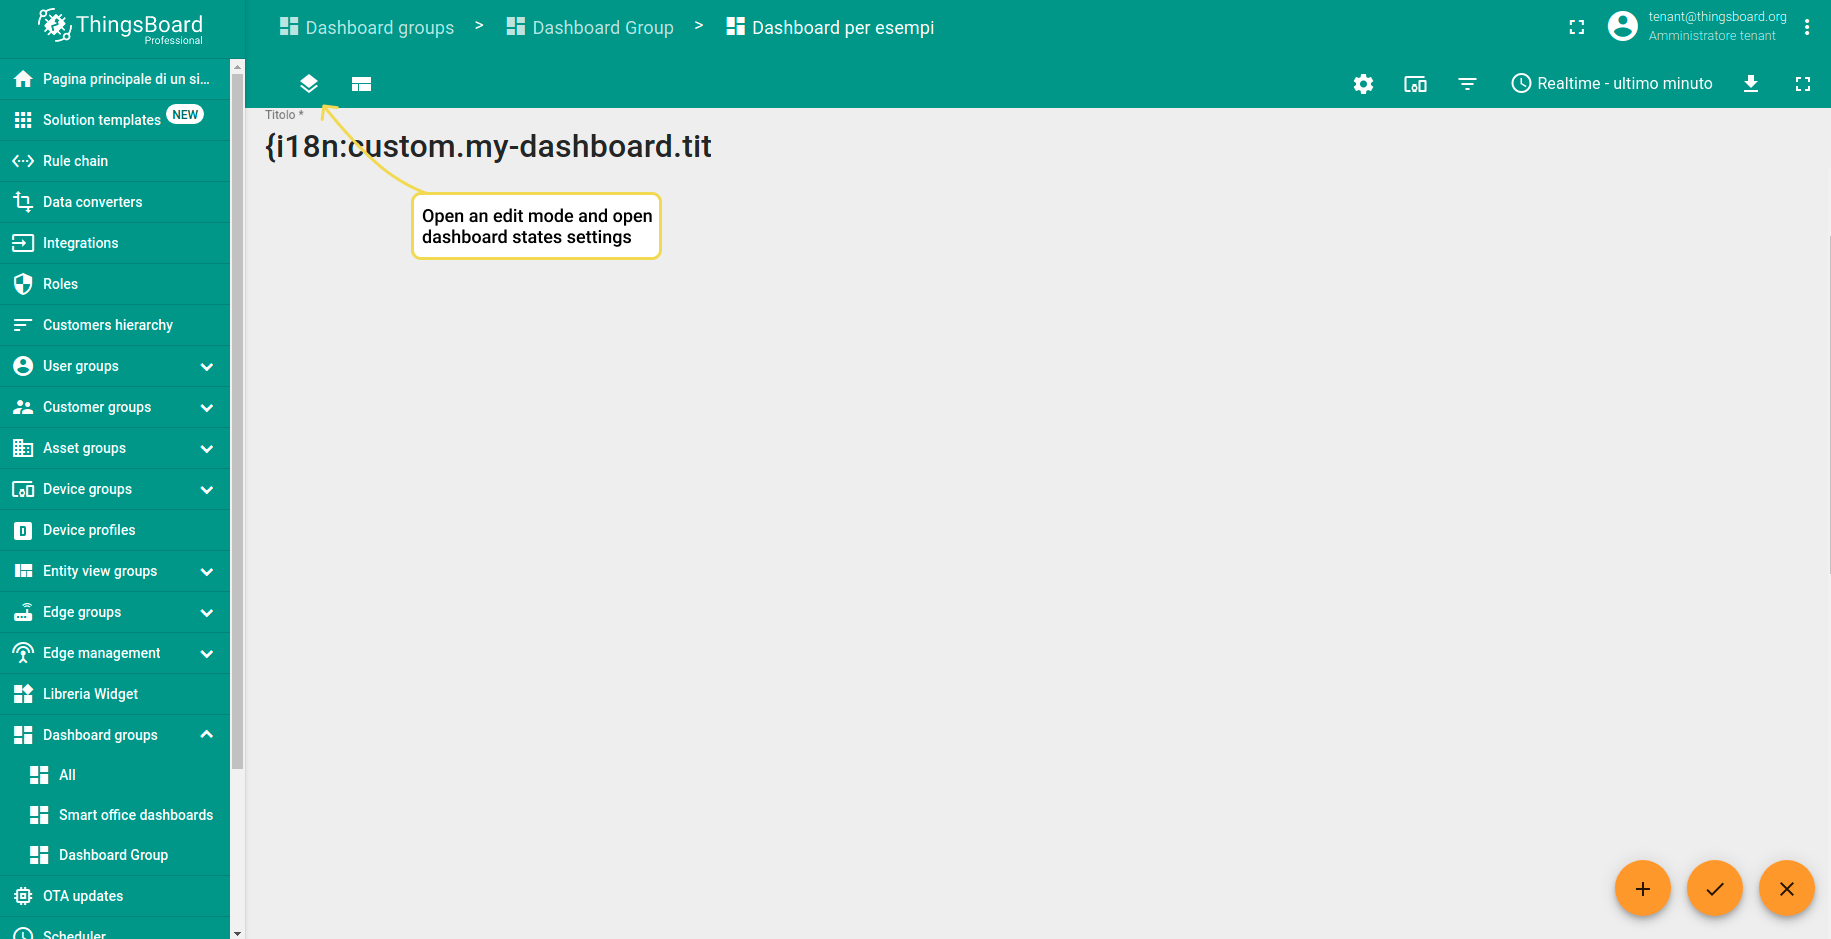
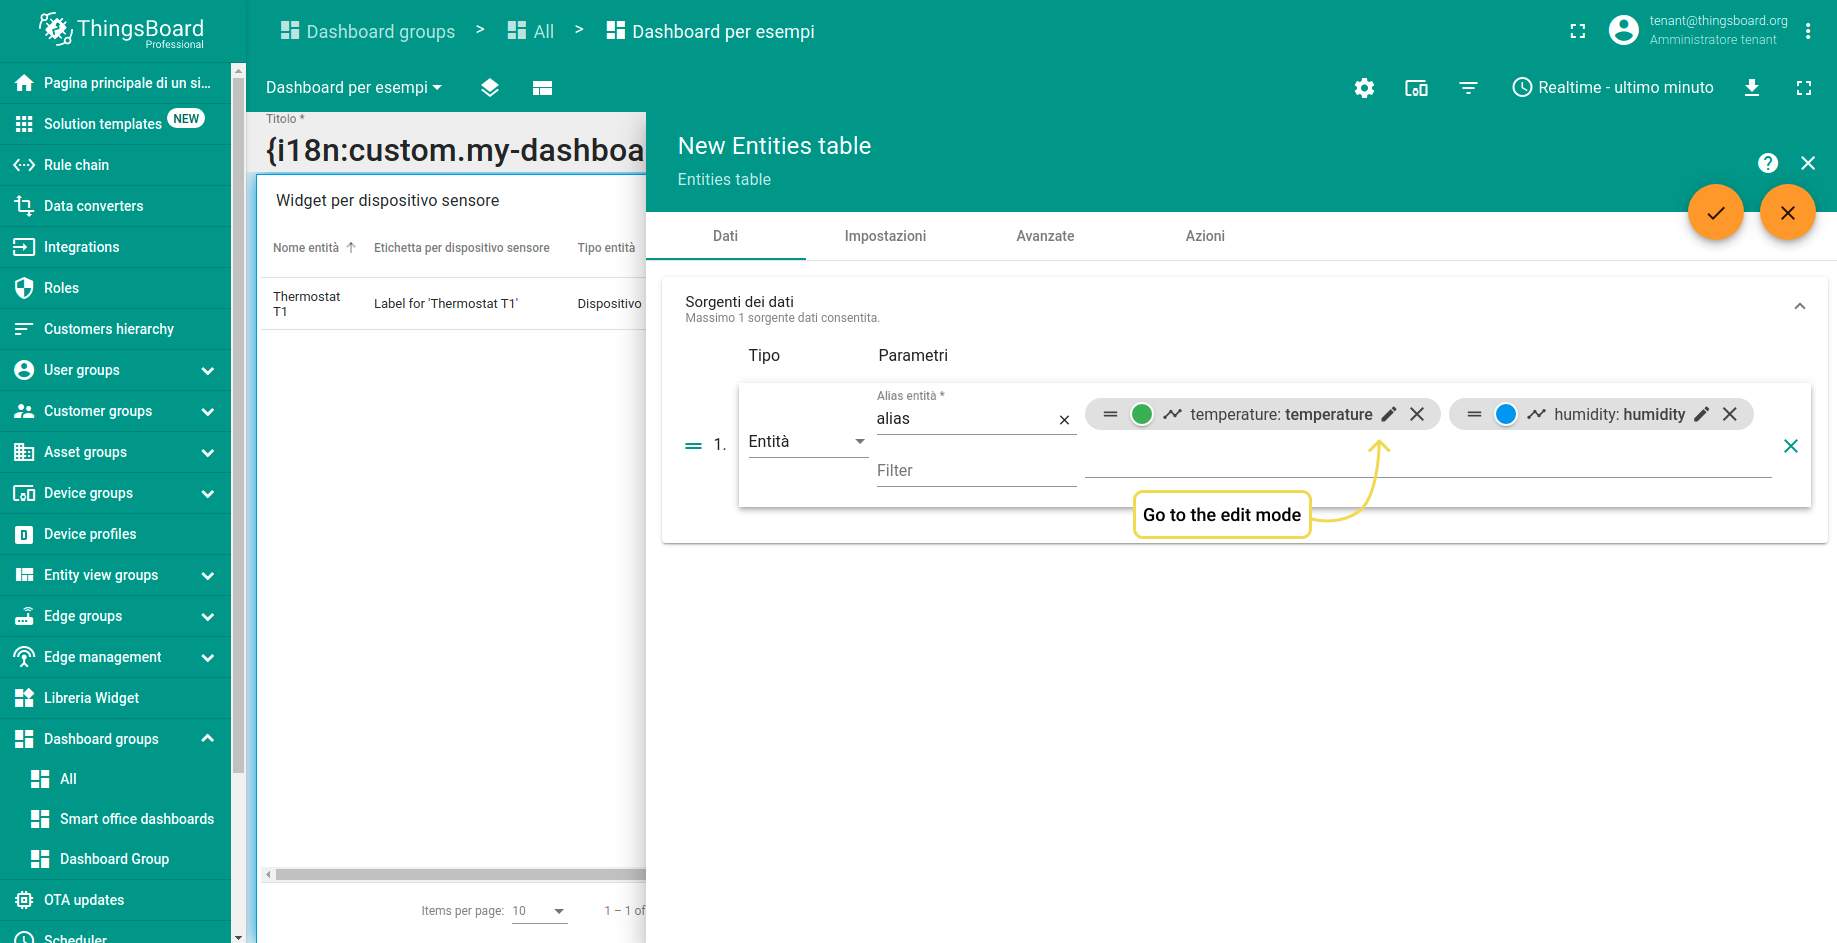
- Step 5. Open an edit mode and go to the dashboard states configuration.
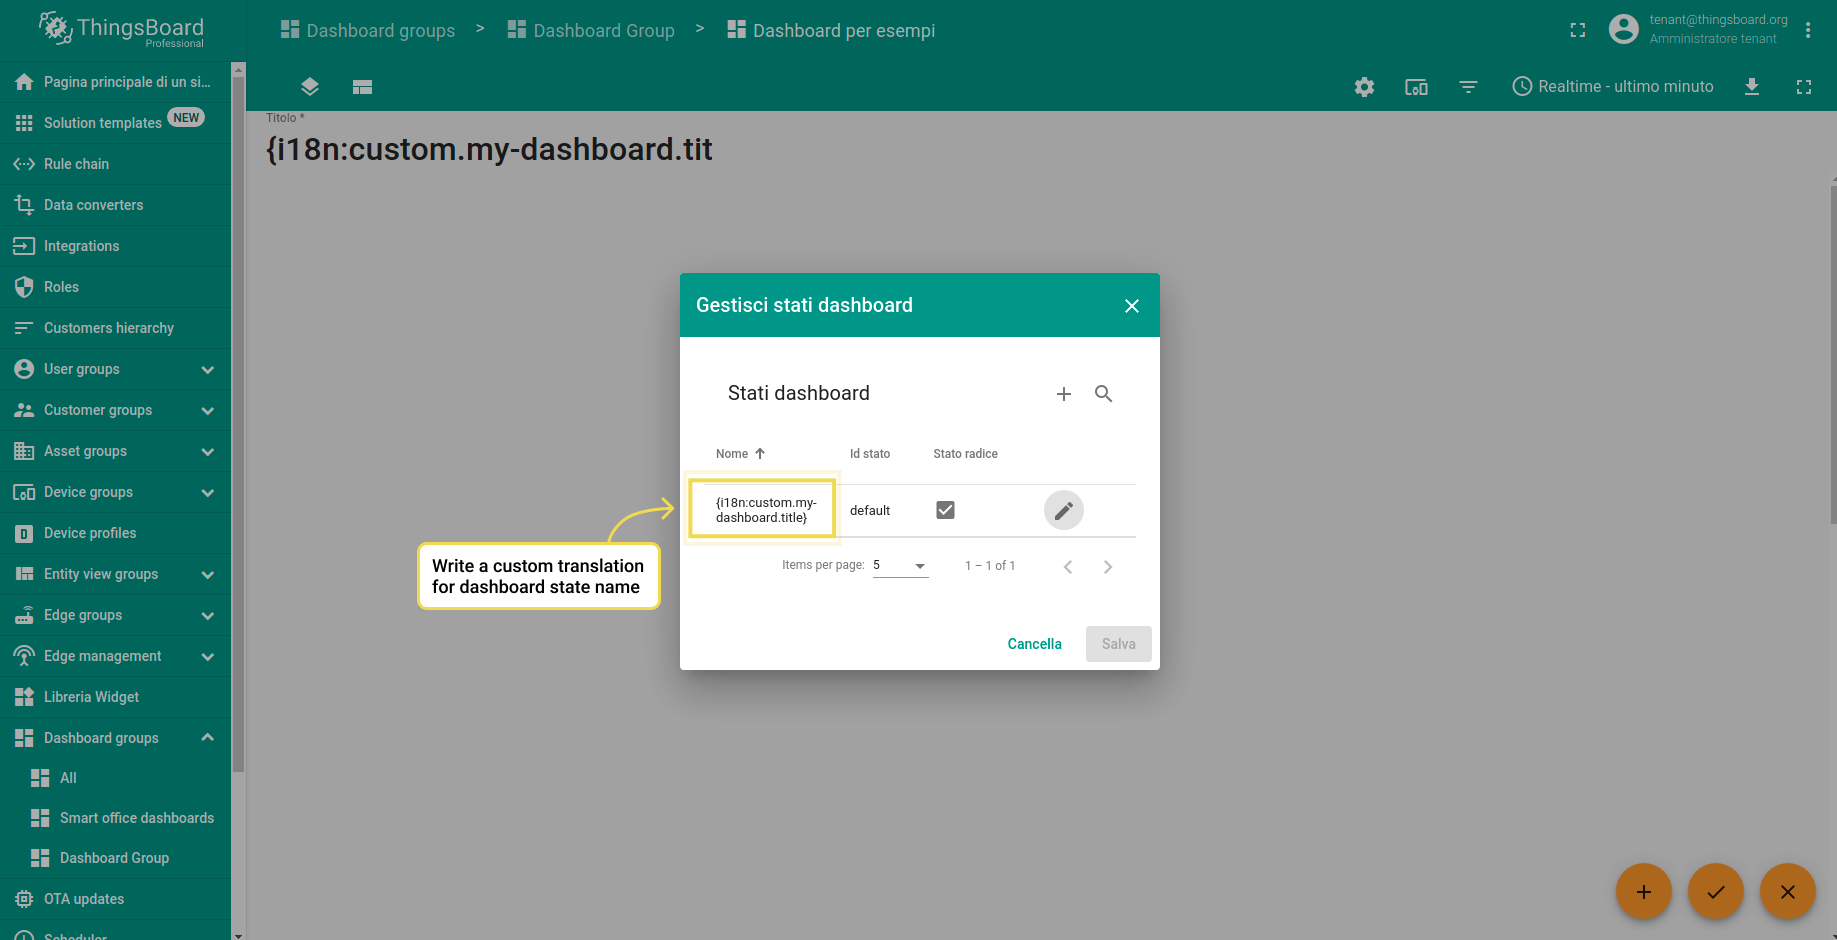
- Step 6. Write custom translation for the dashboard state name.
Widgets
Common Usage
Titles:
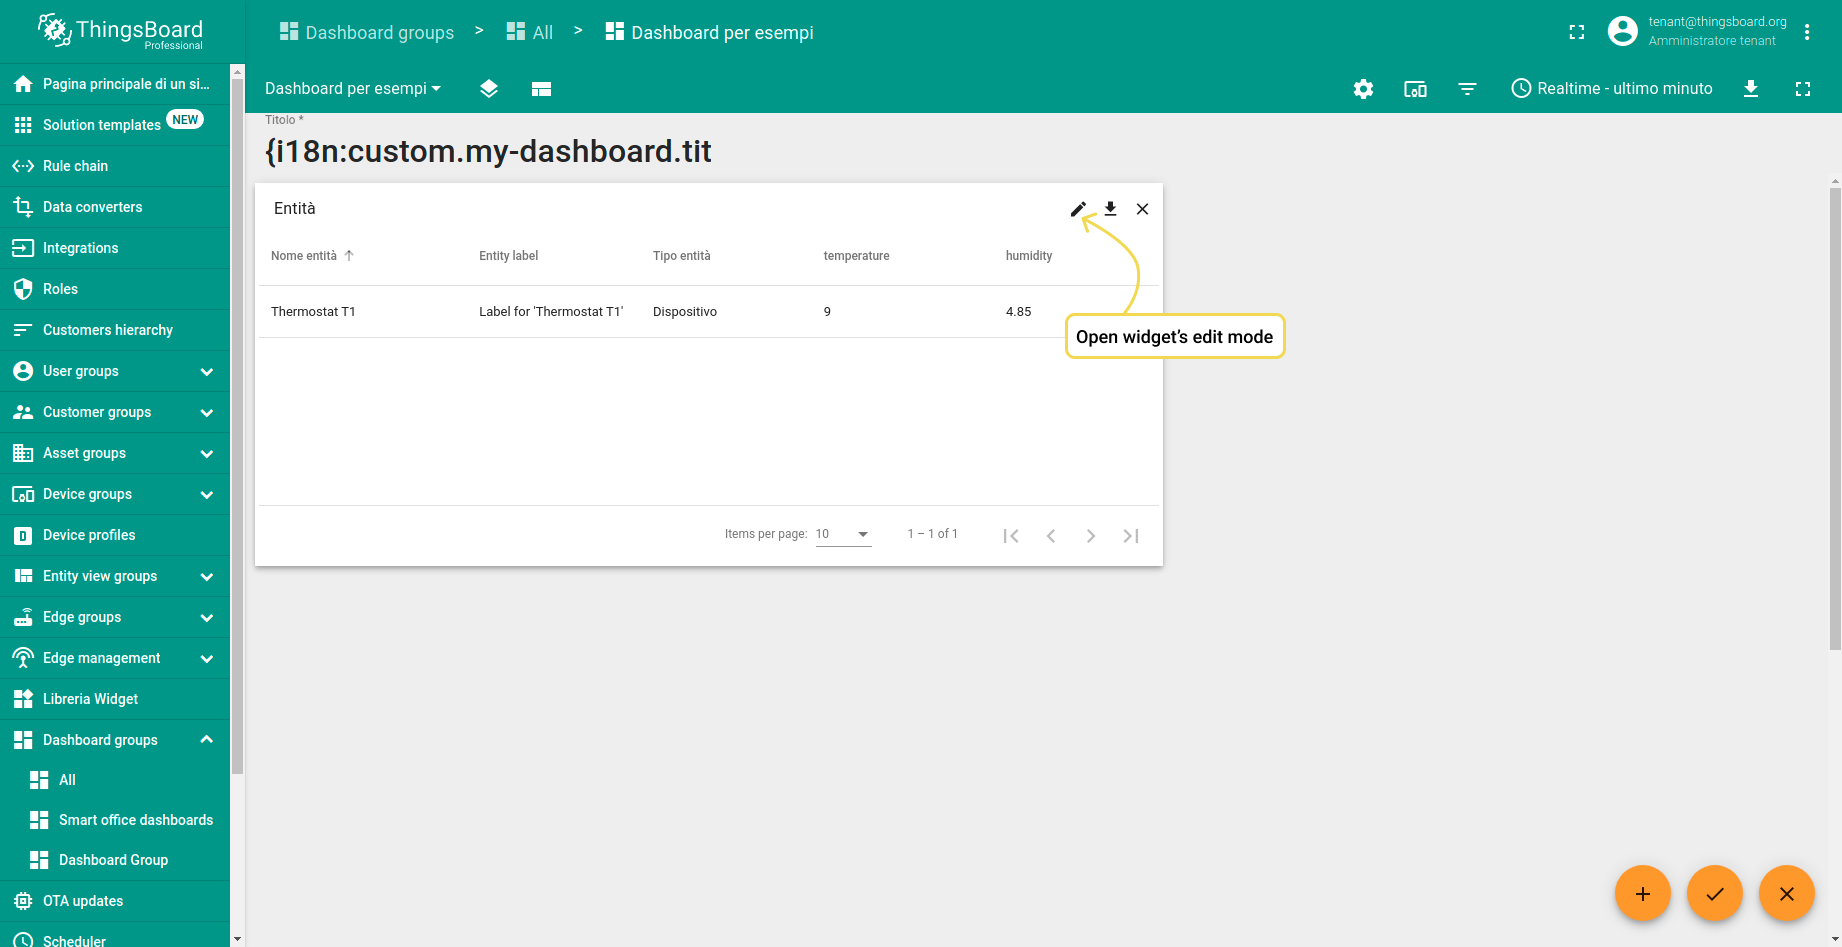
- Step 1. Go to the dashboard. Open an edit mode.
- Step 2. Open widget edit mode.
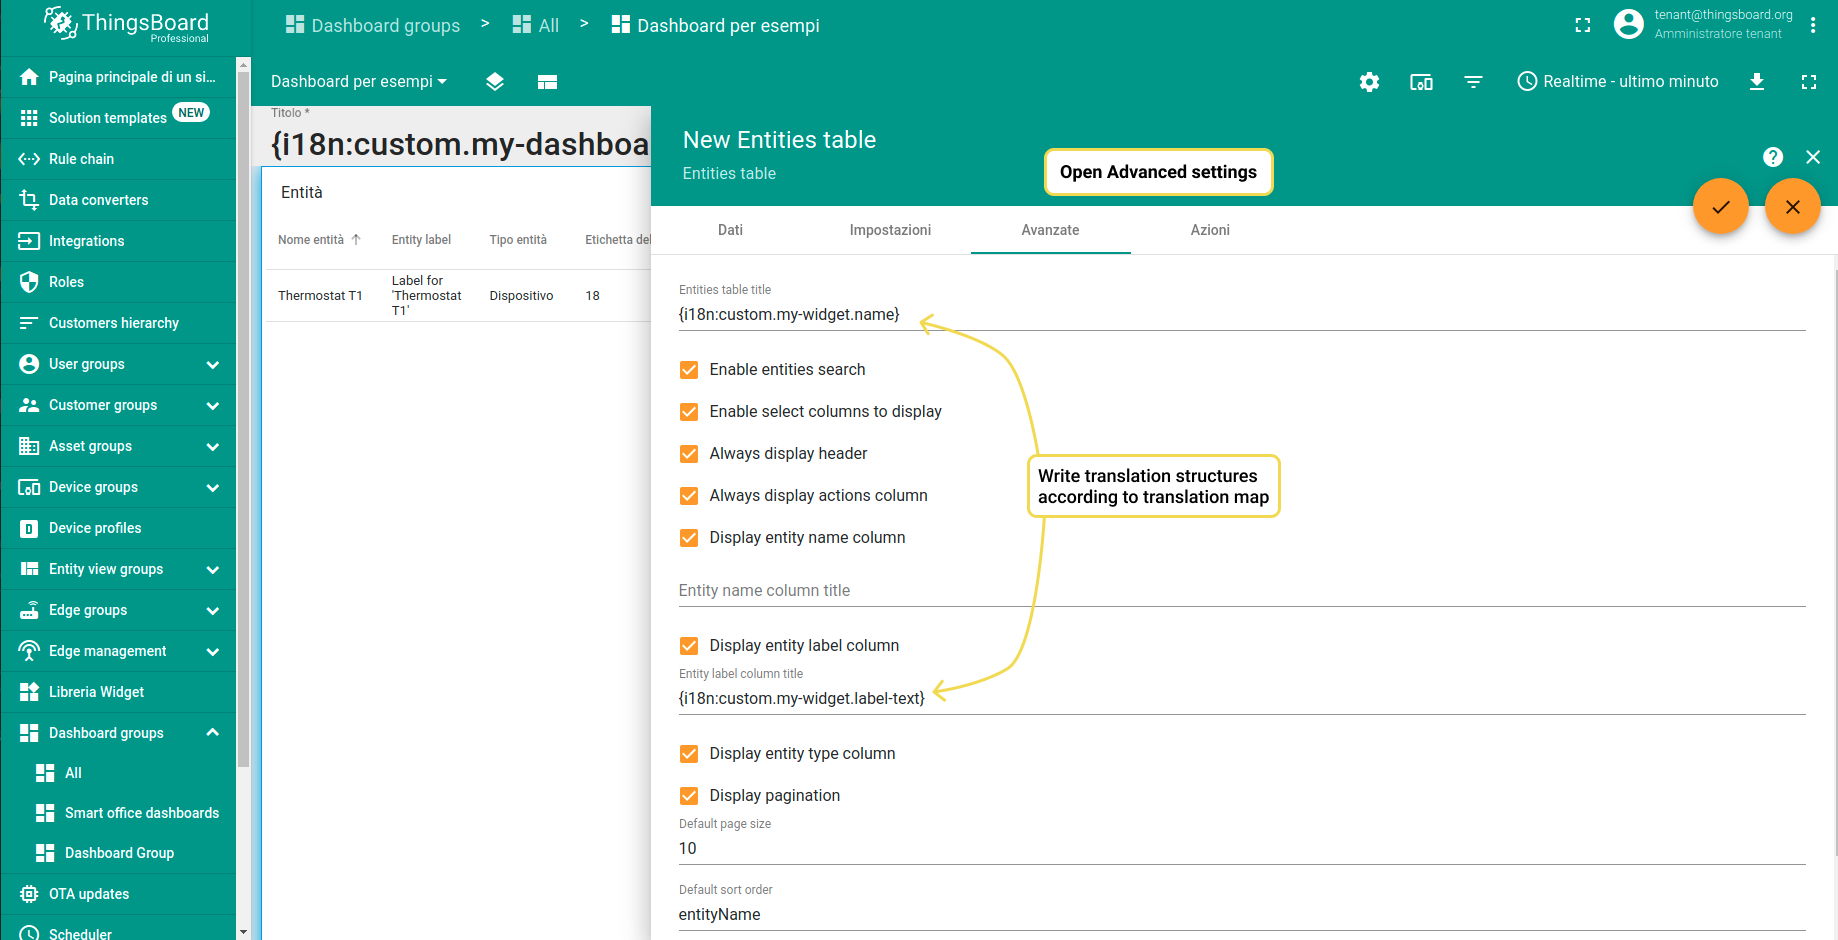
- Step 3. Apply translation to the widget title - {i18n:custom.my-widget.name}, and entity label column title - {i18n:custom.my-widget.label-text}.
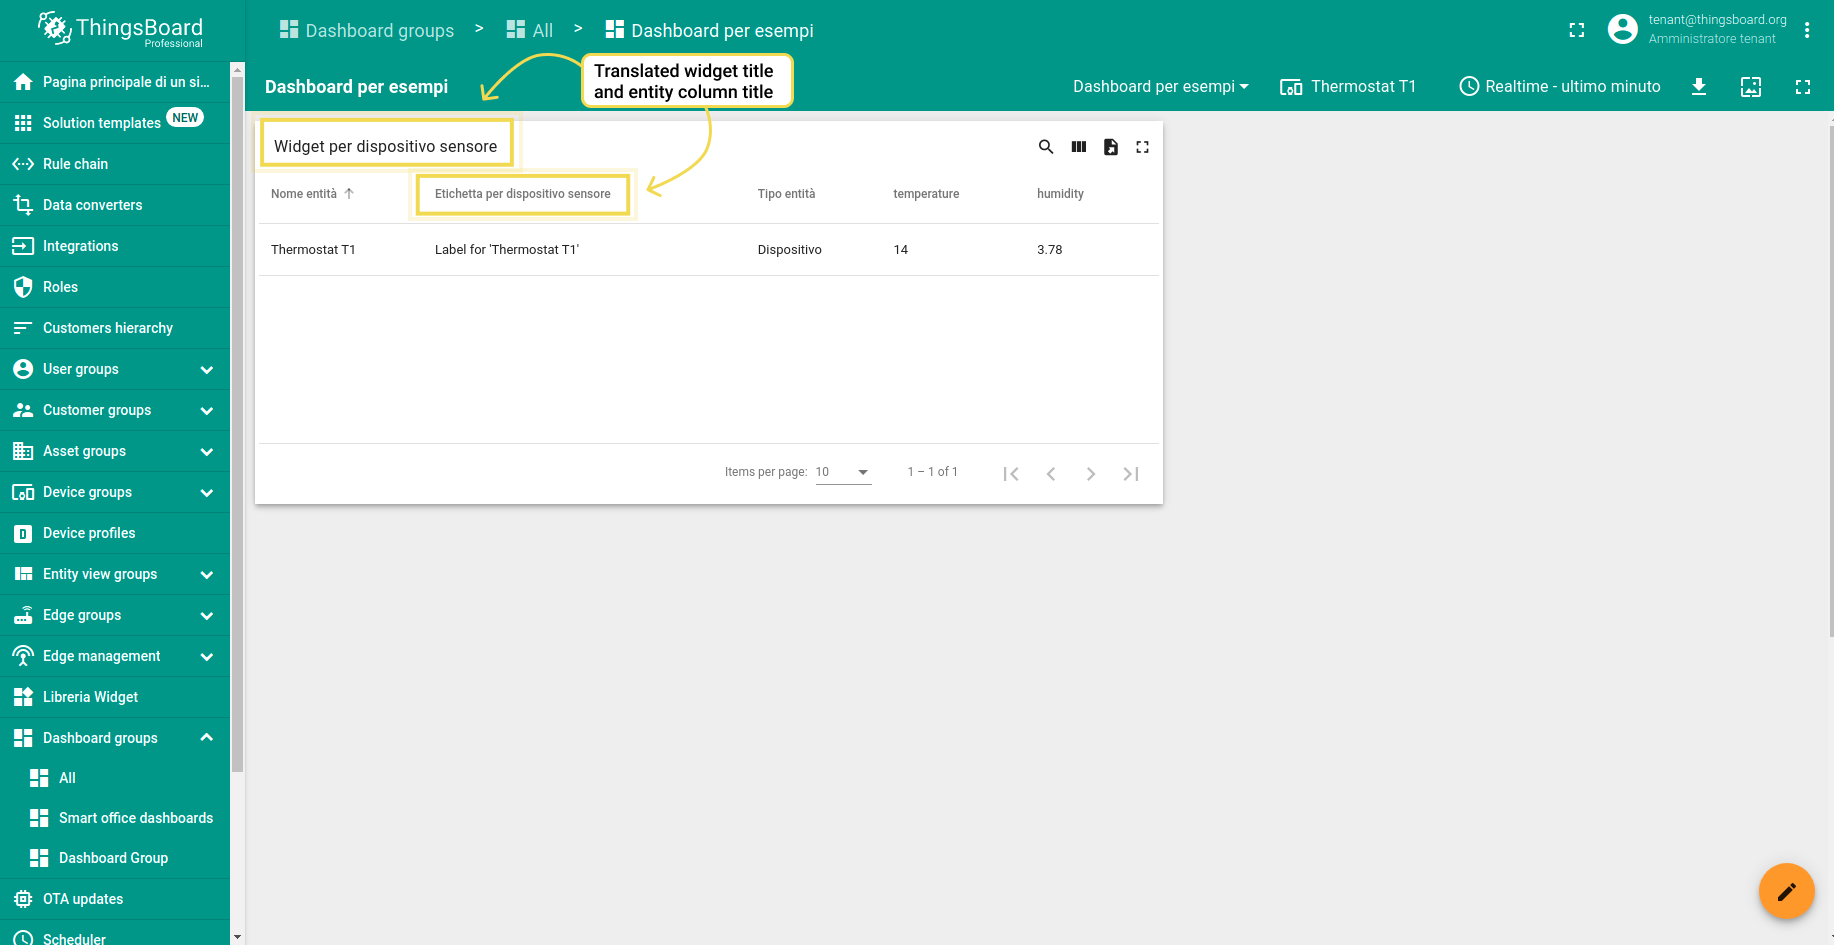
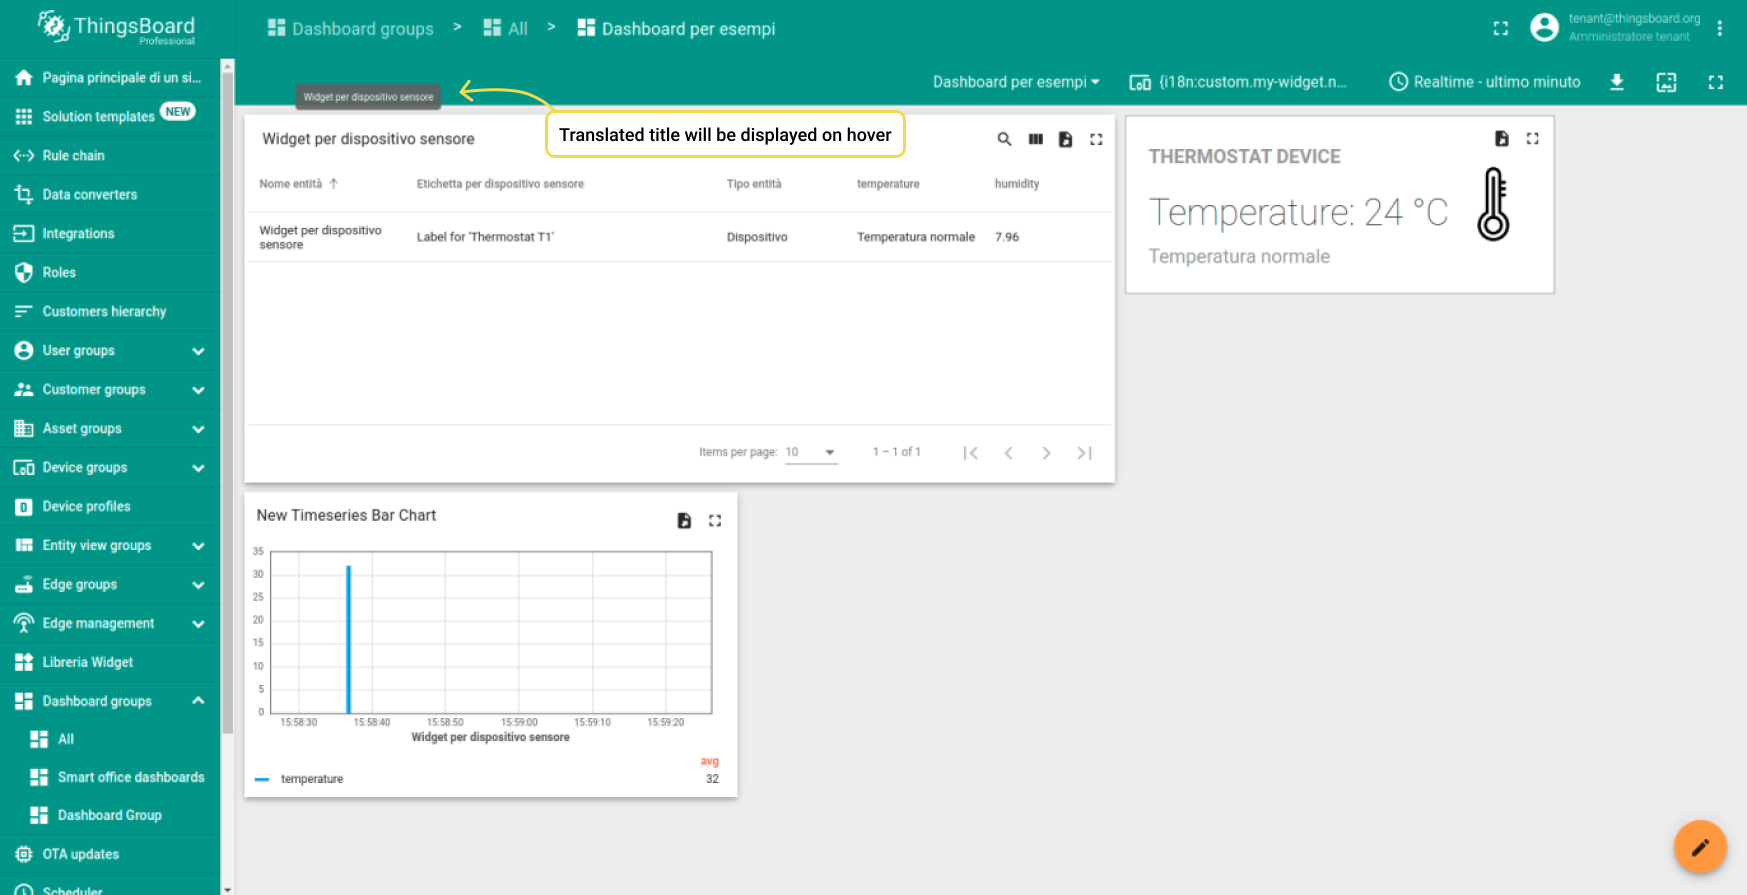
- Step 4. Check translated titles.
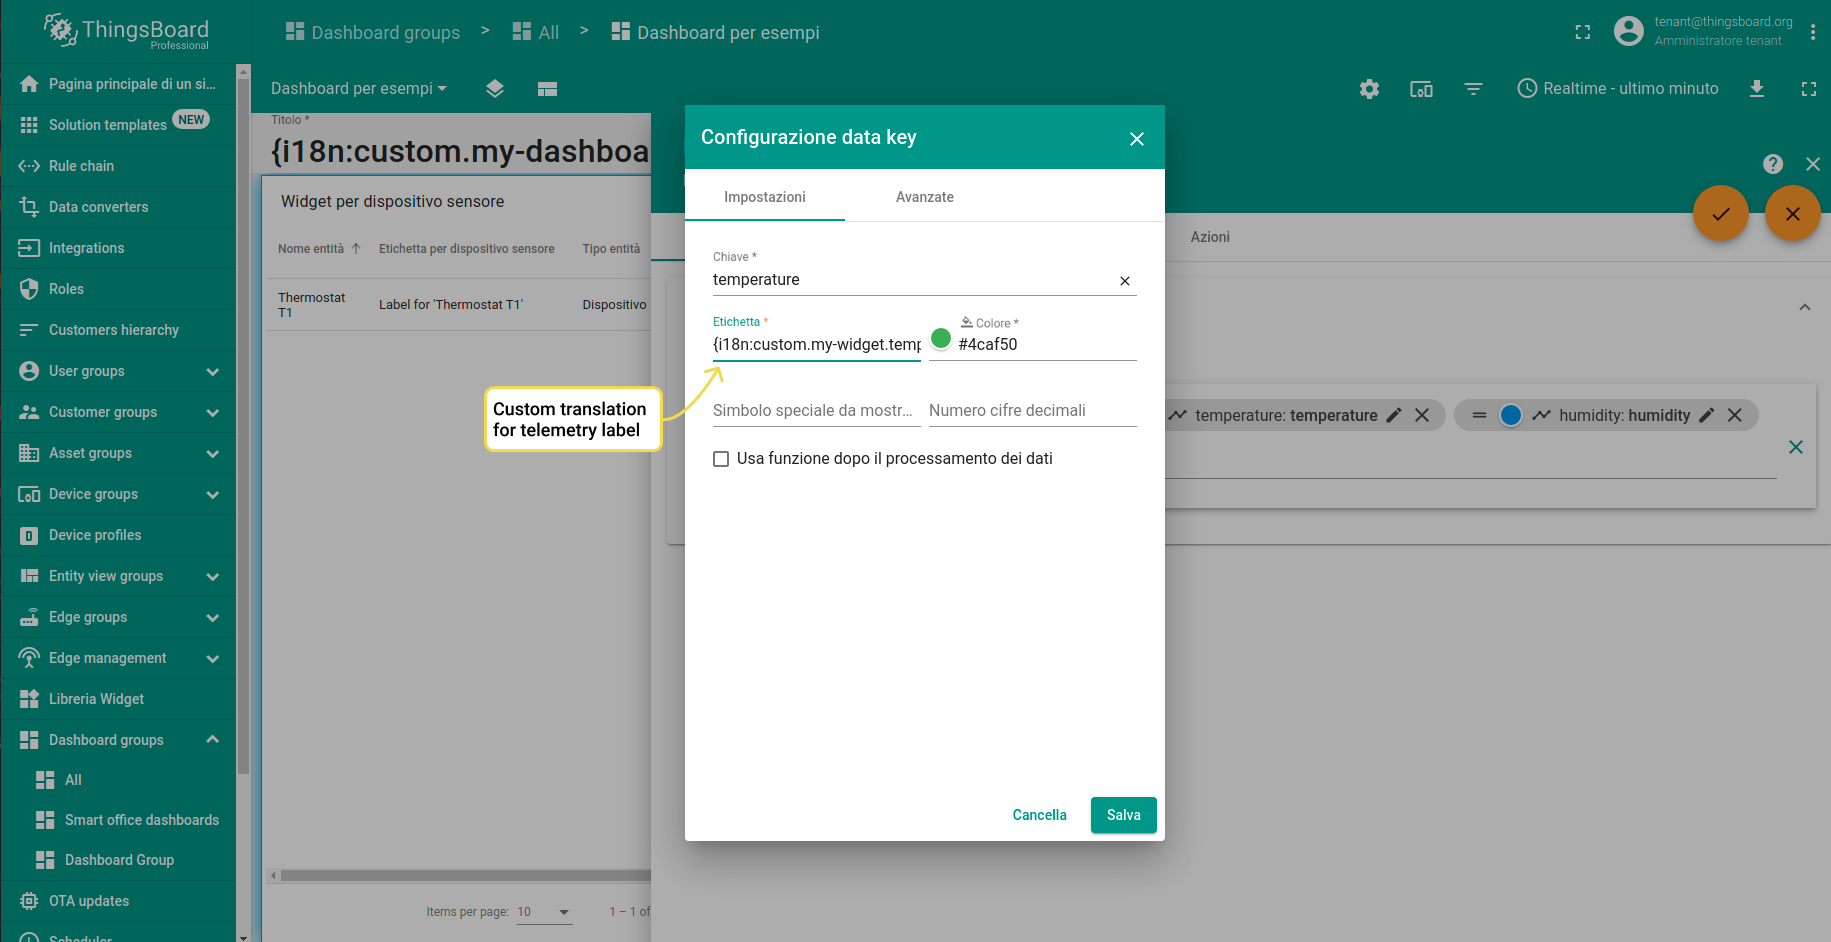
- Step 5. Apply translation to the data key configuration as a label - {i18n:custom.my-widget.temperature}.
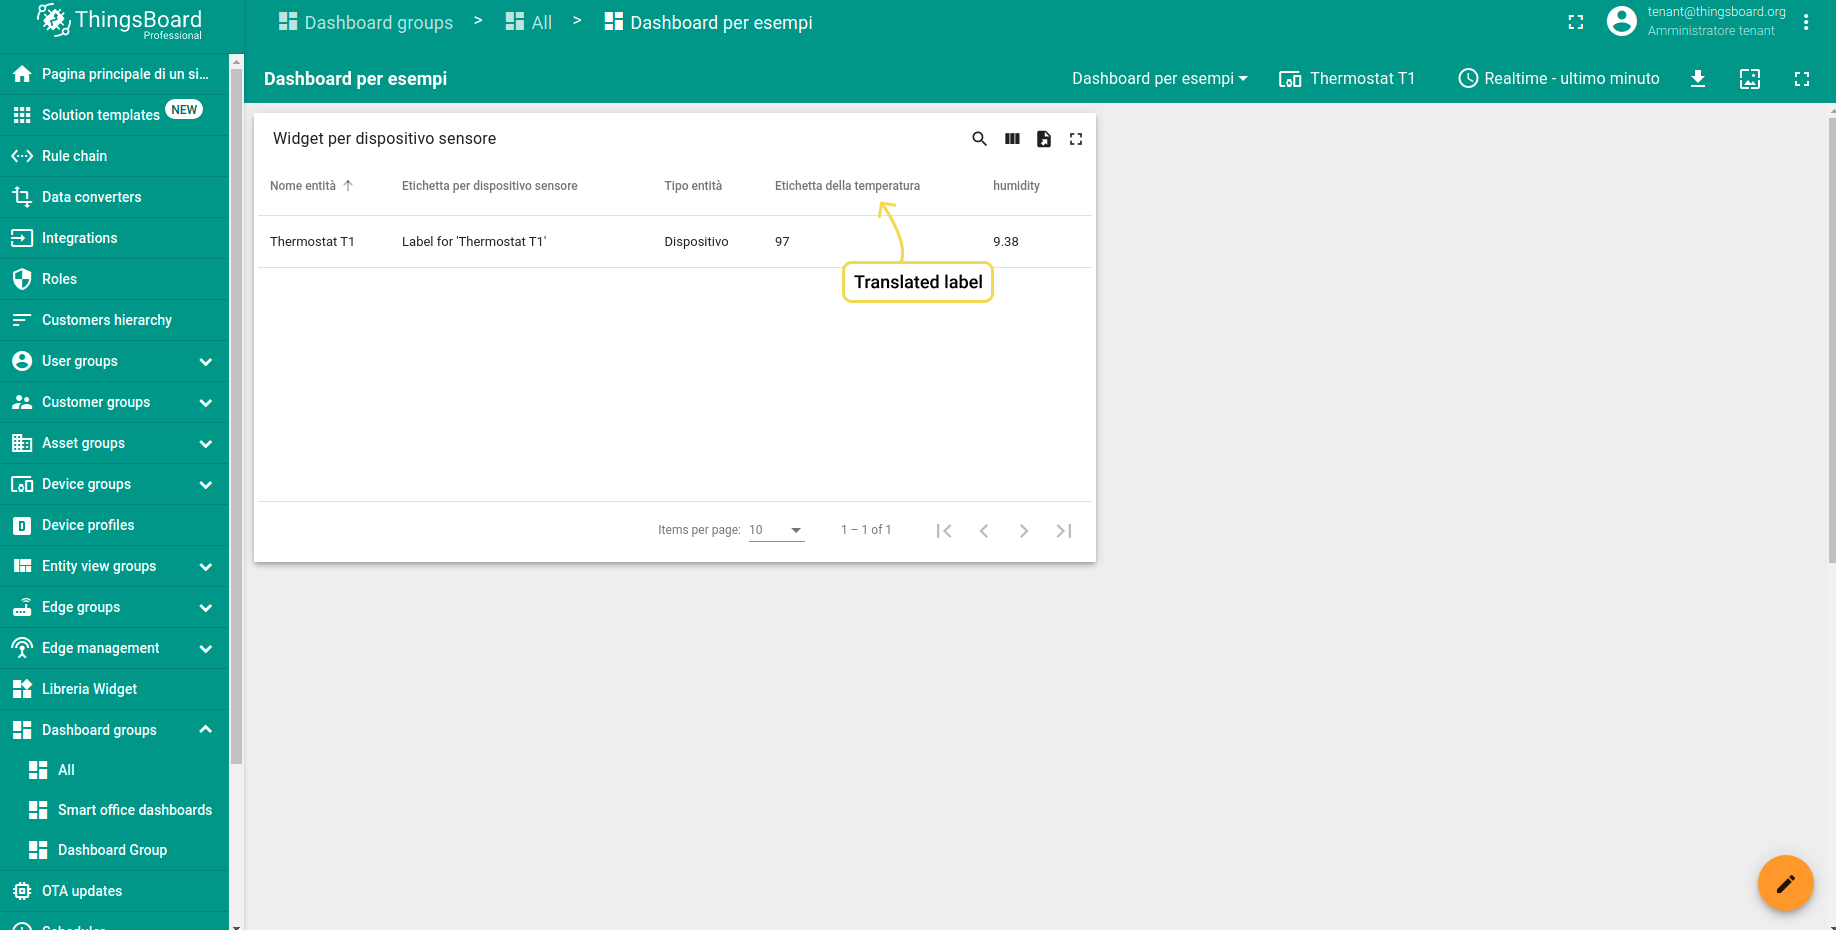
- Step 6. Check translated label.
Tooltips:
- Step 1. Open an edit mode.
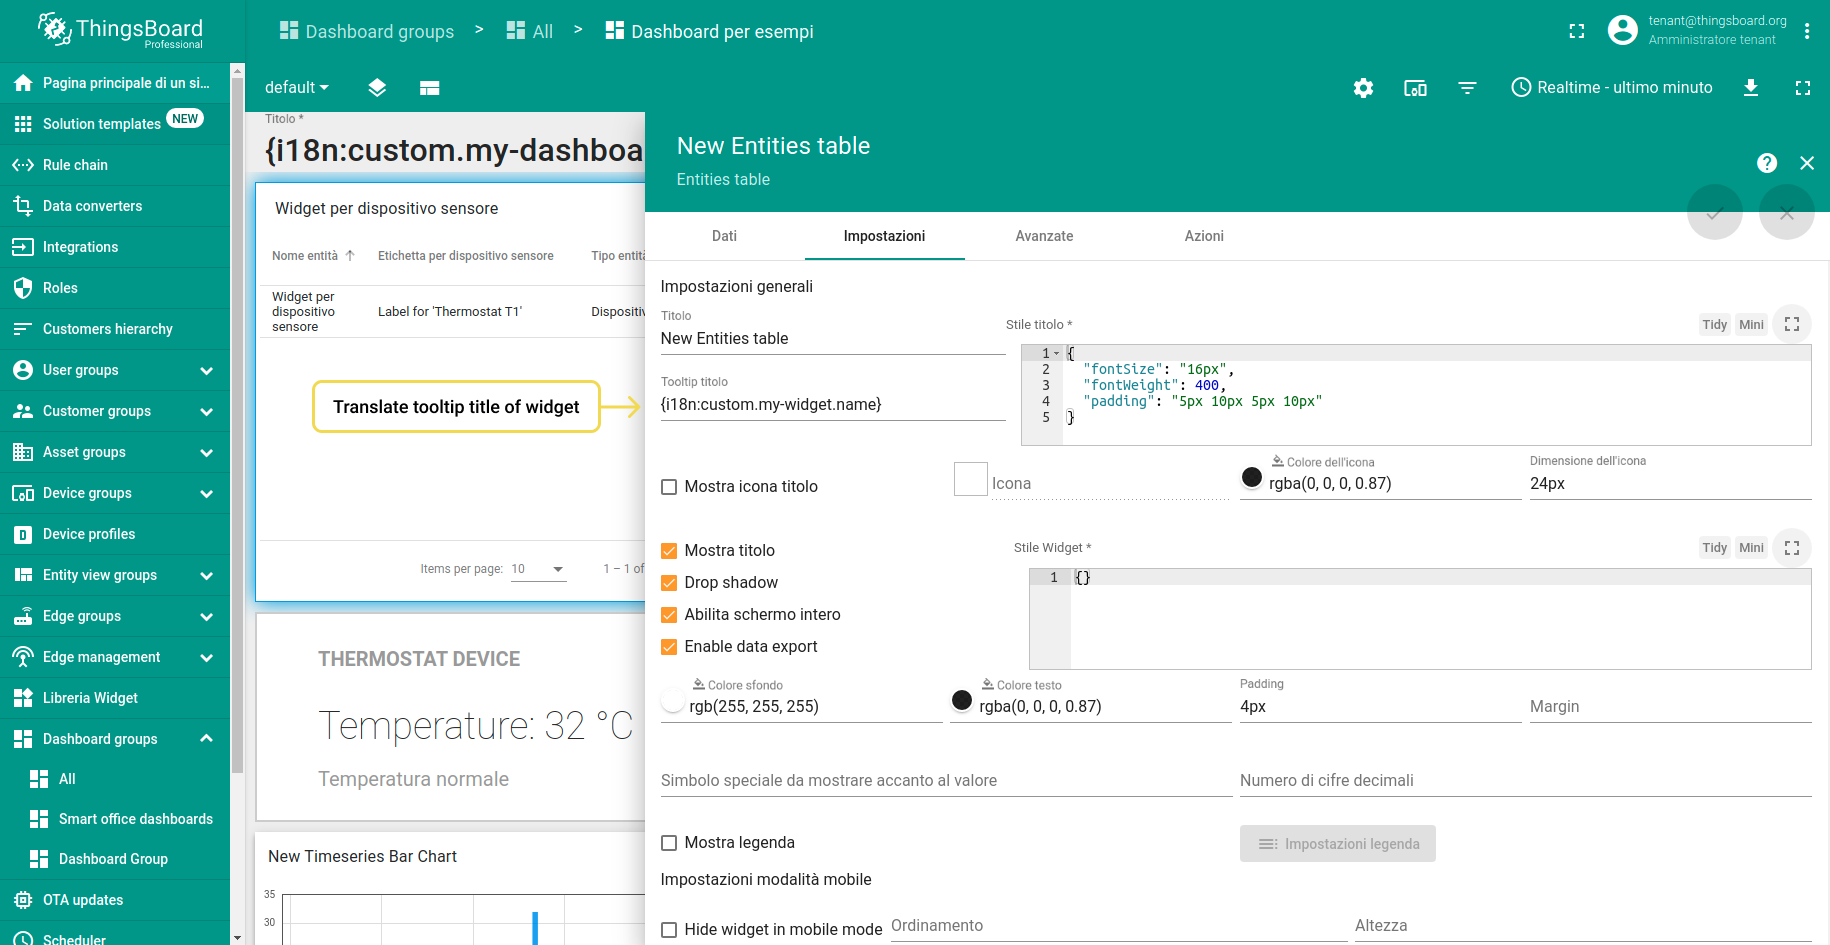
- Step 2. In the Settings tab, write the new structure for the tooltip title as follows: - {i18n:custom.my-widget.name}. Then, save it.
- Step 3. Hover on widget title and check applied translation.
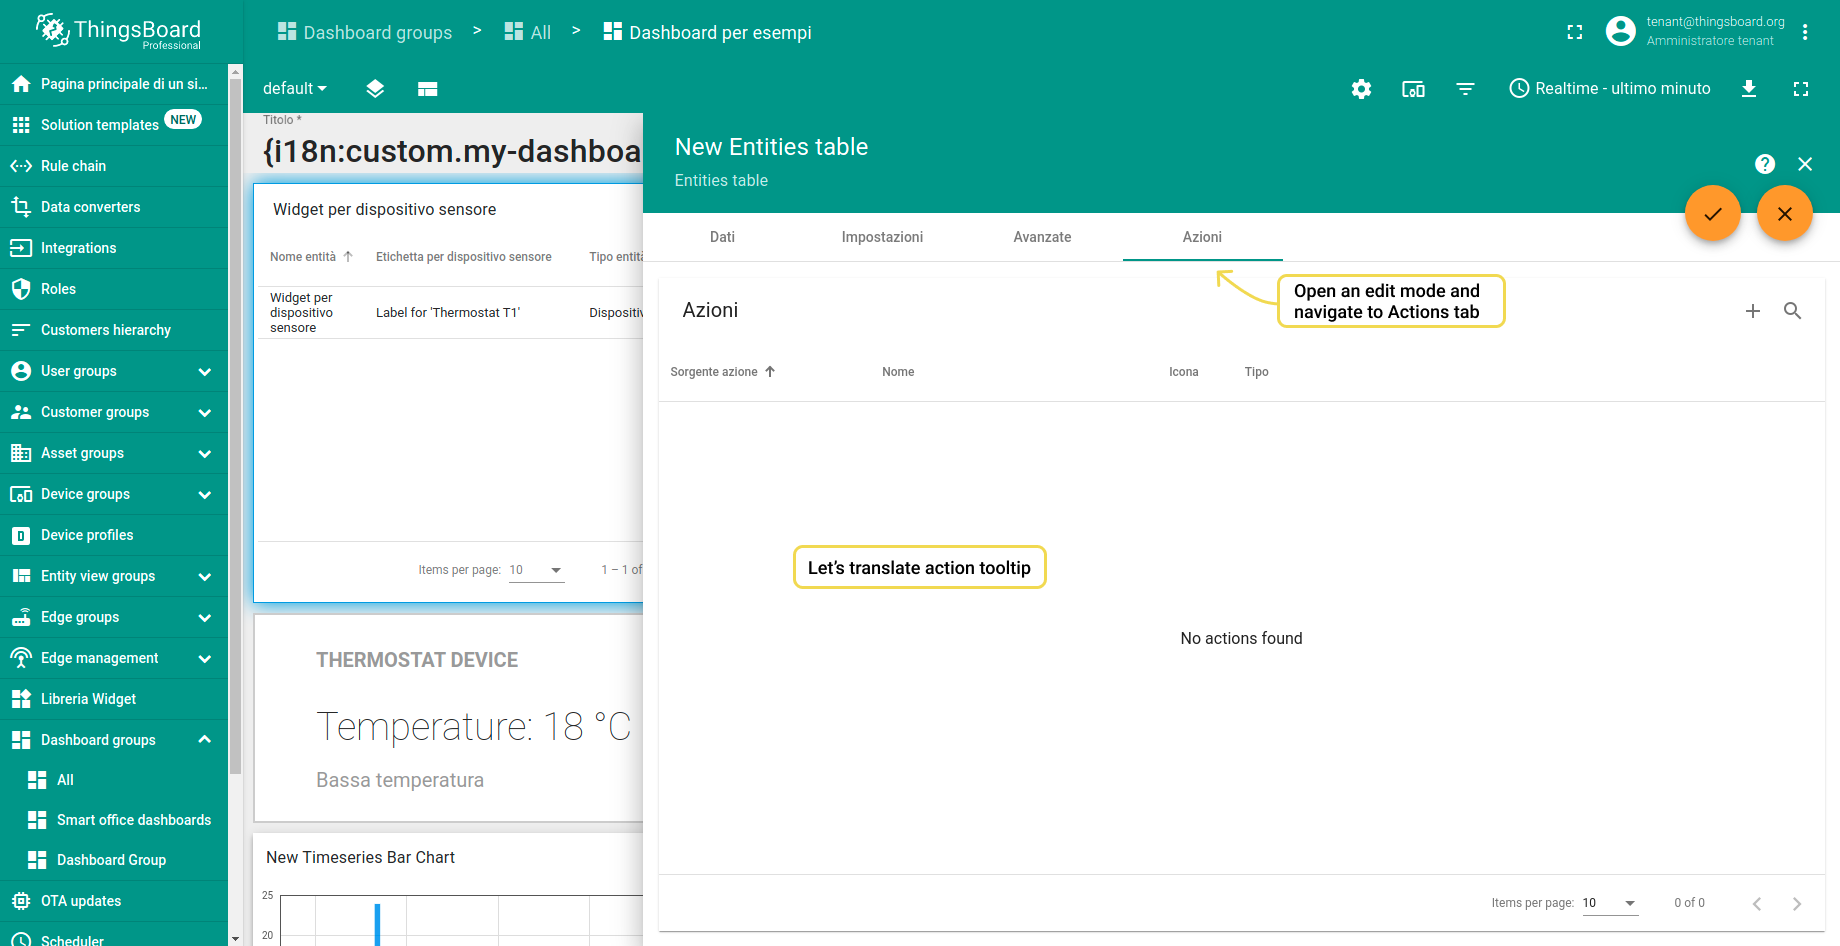
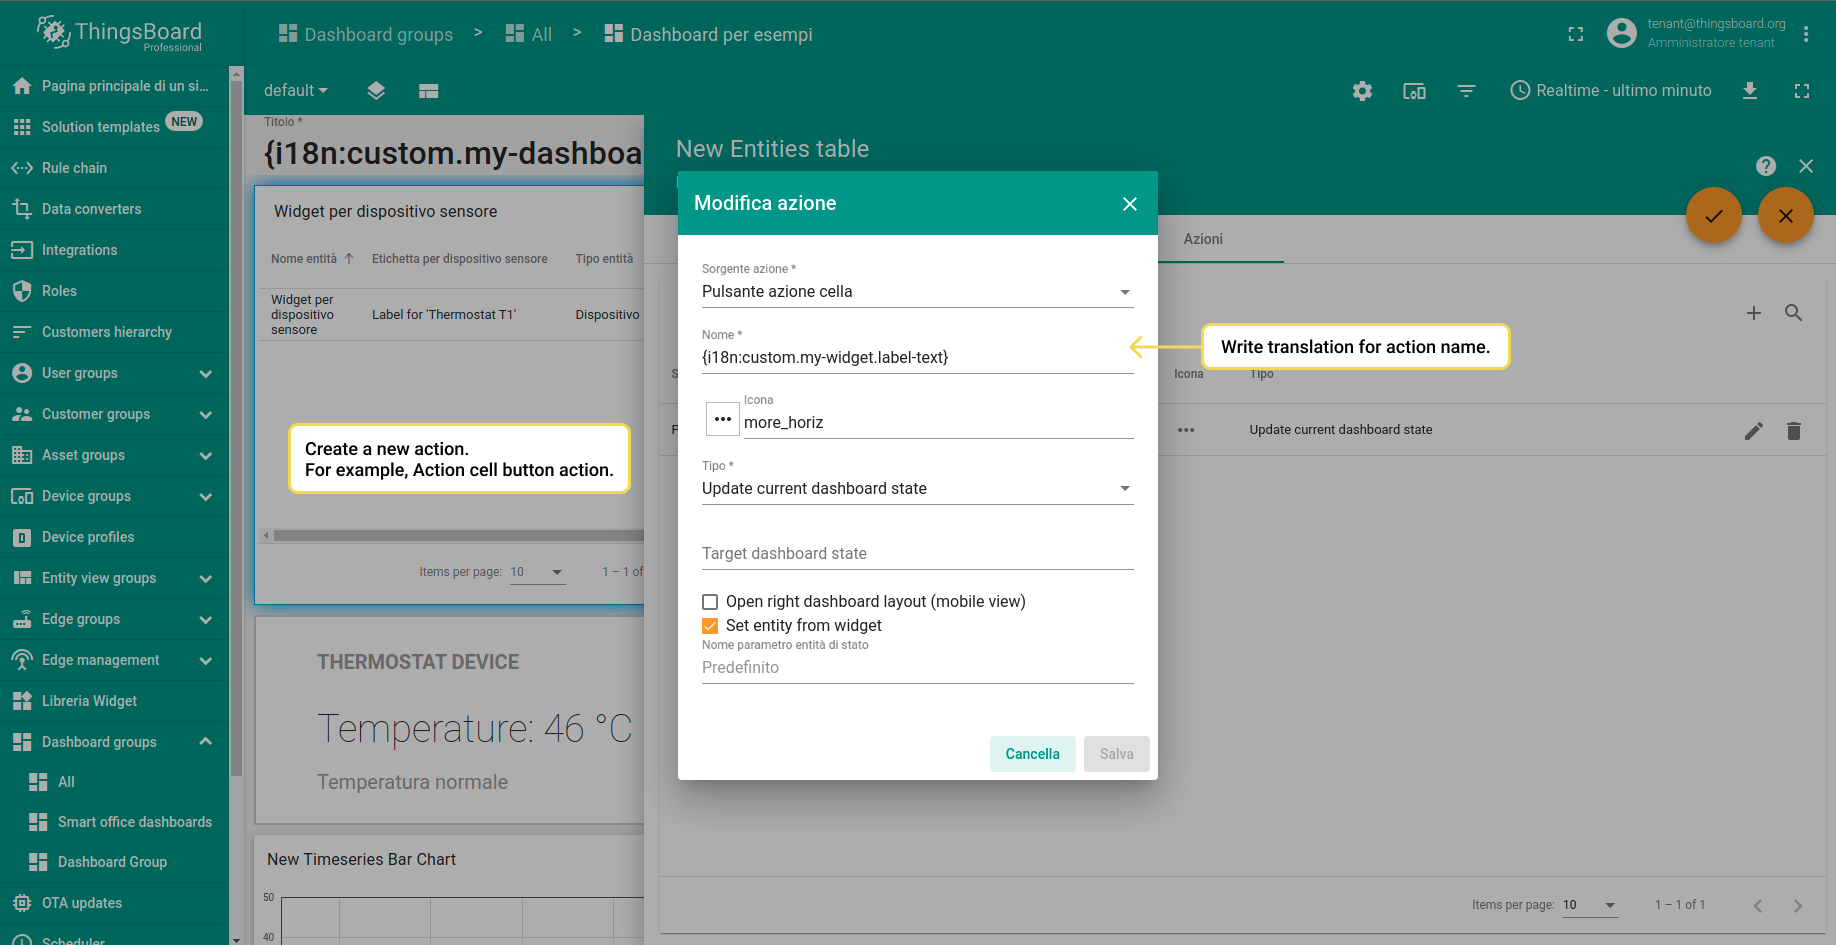
- Step 4. Open widgets edit mode and navigate to an Action tab.
- Step 5. Create new custom action and fill the Name field with {i18n:custom.my-widget.label-text}. Apply changes.
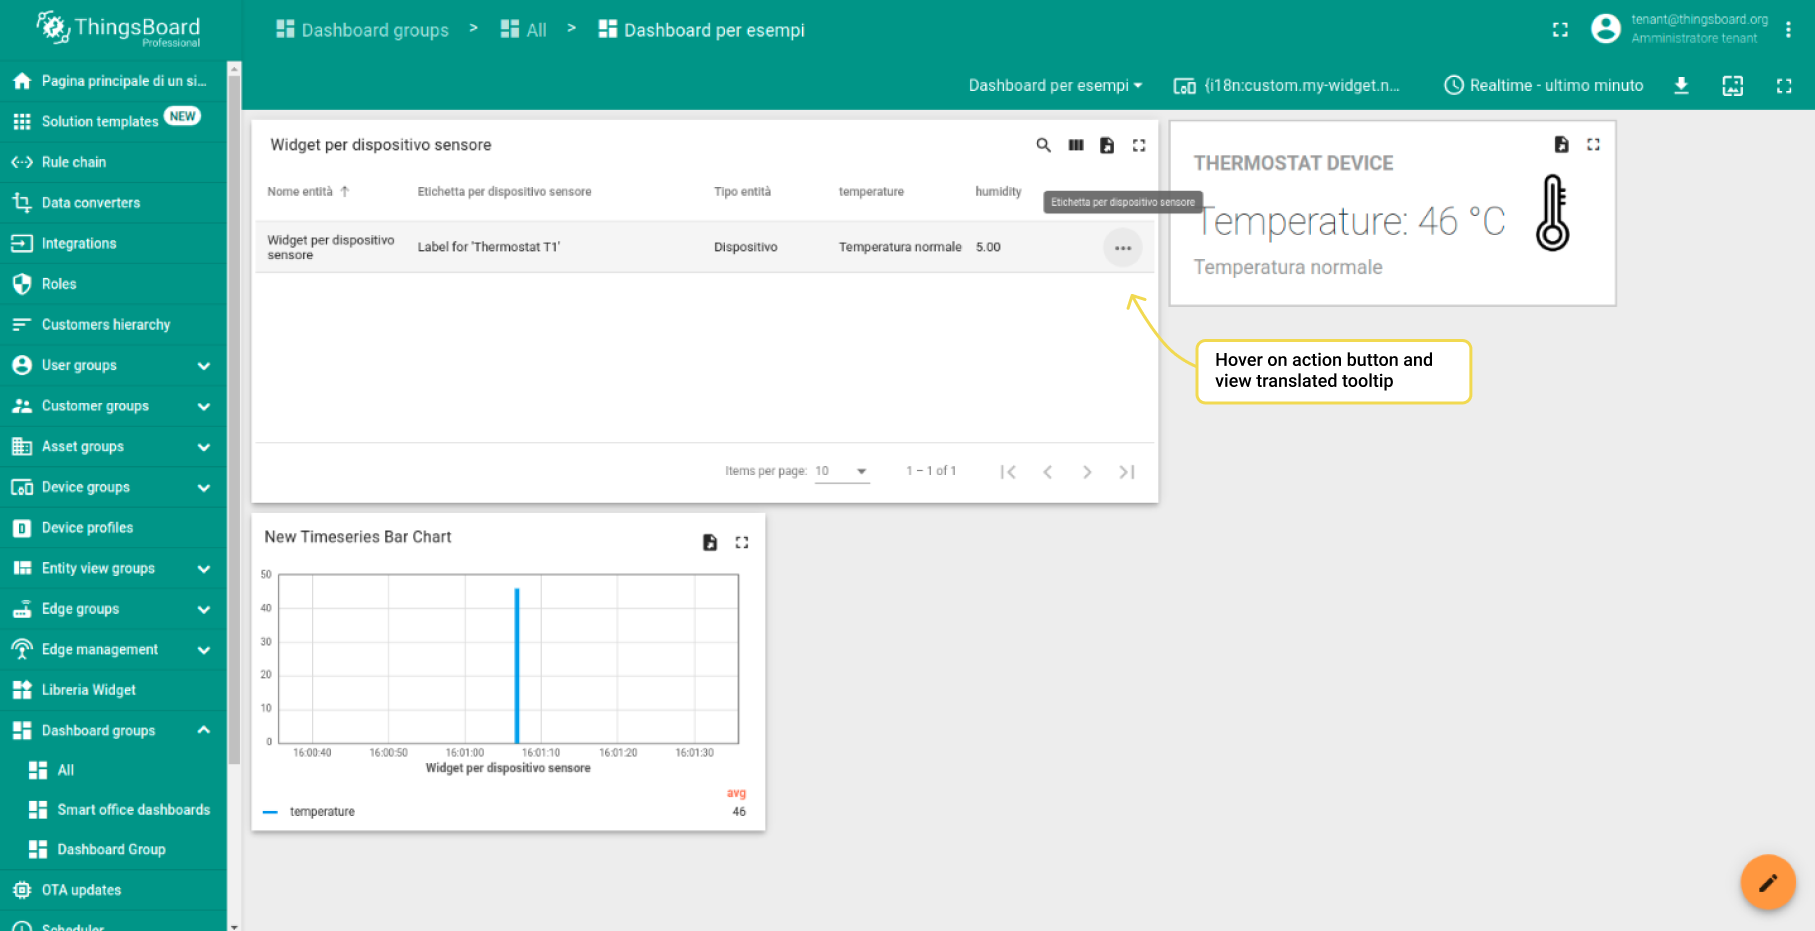
- Step 6. Hover on an action button and view custom tooltip.
Usage in the cell content function
- Step 1. Specify new custom translation for the telemetry data.
- Step 2. Open widget settings and go to the data key configuration.
- Step 3. Custom translation can be used in the cell content function in such widgets as Entity Table, Timeseries table and Alarms table. JavaScript code requires quotes for the i18n.
- Step 4. Get the message from translation map if temperature is high.
- Step 5. Get the message when temperature is low.
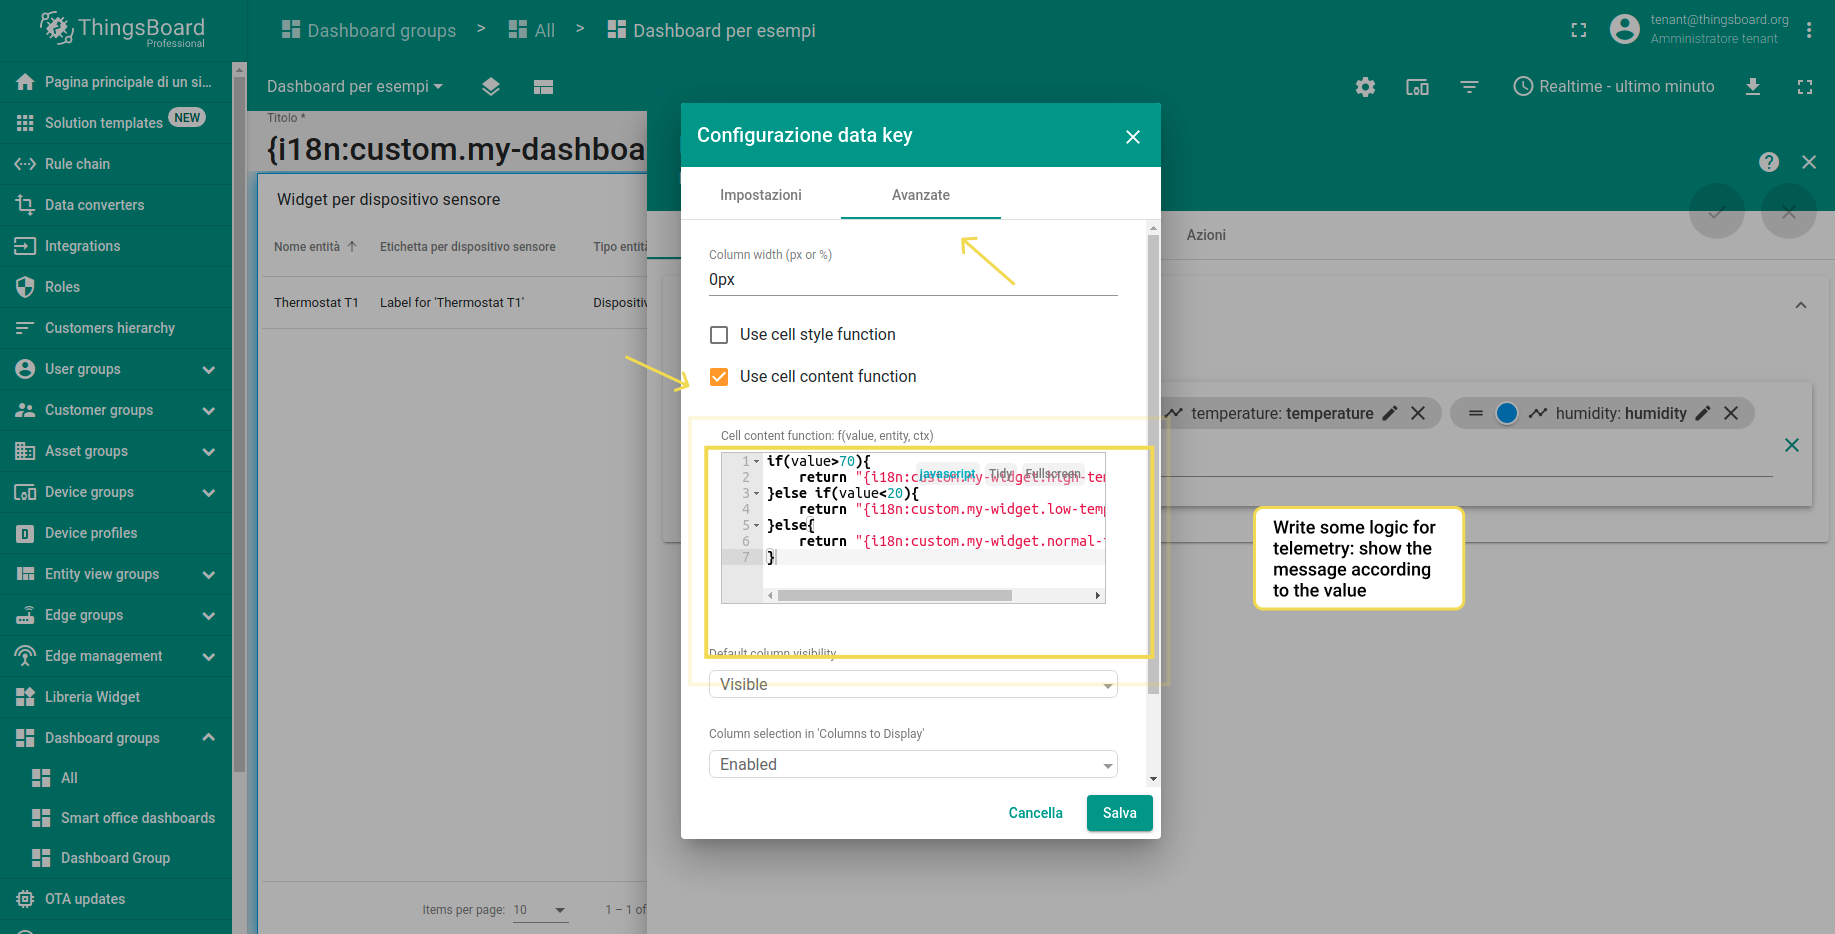


JavaScript code examples for cell content function
1
2
3
4
5
6
7
if(value>70){
    return "{i18n:custom.my-widget.high-temperature}";
}else if(value<20){
    return "{i18n:custom.my-widget.low-temperature}";
}else{
    return "{i18n:custom.my-widget.normal-temperature}";
}
Usage in HTML Value Card
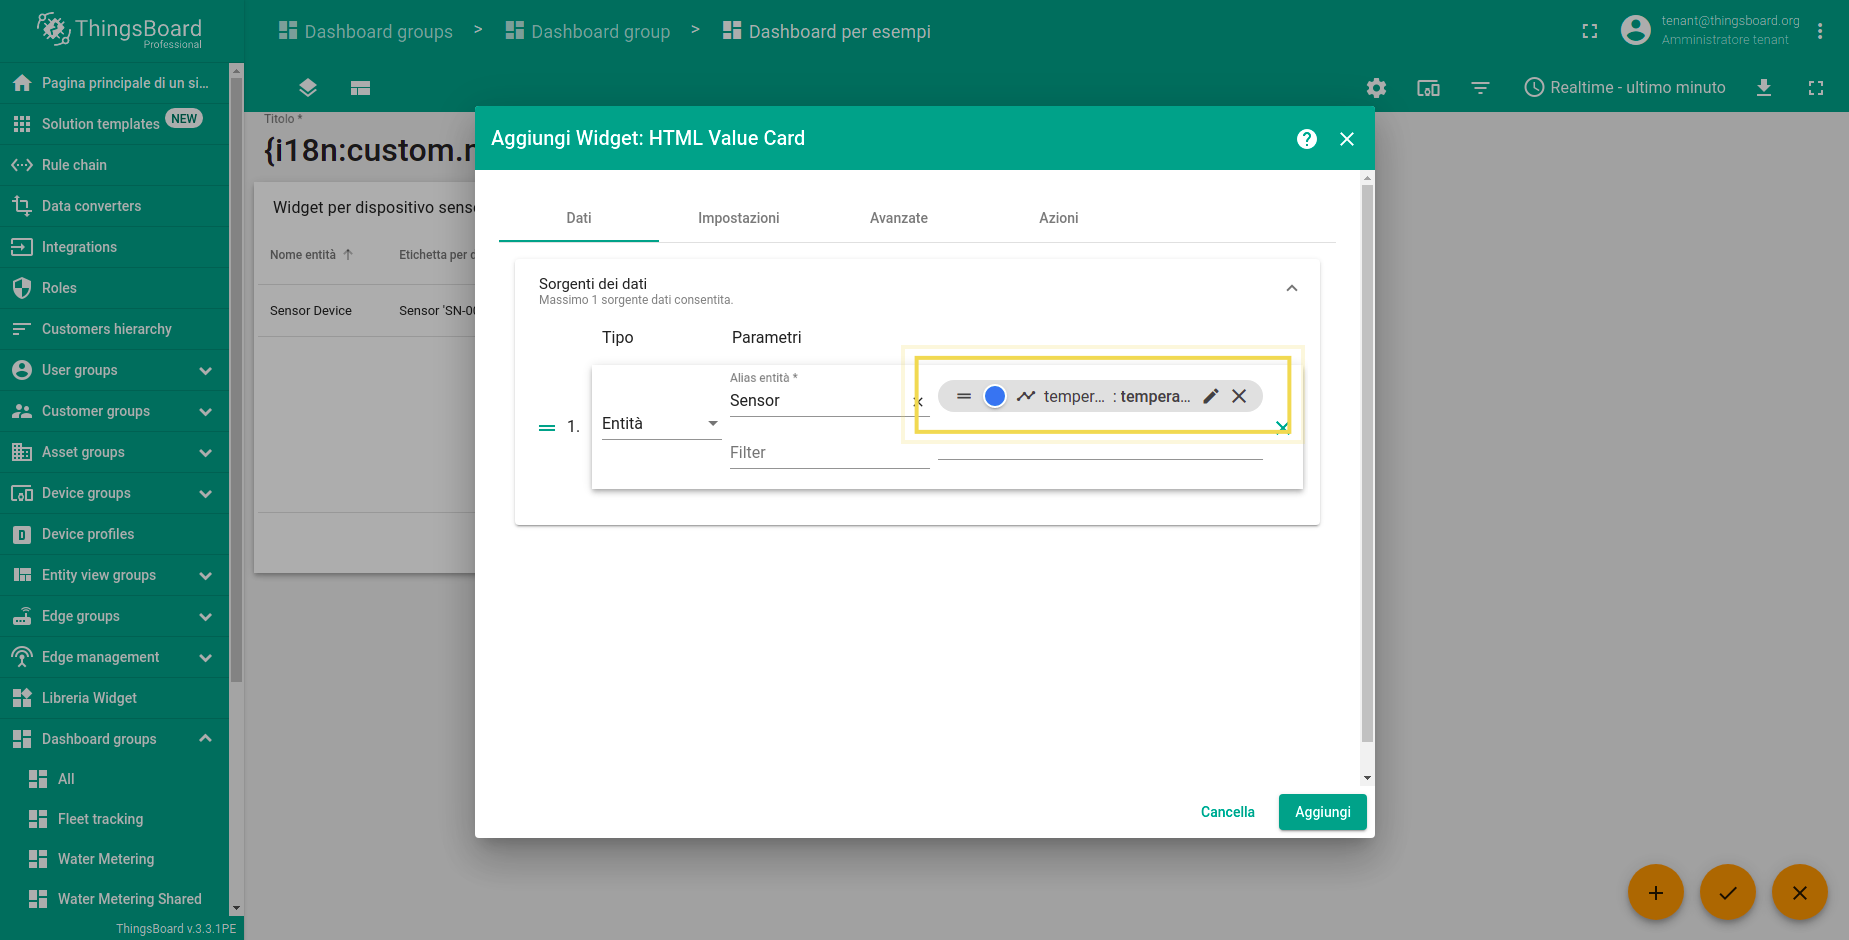
- Step 1. Choose HTML Value Card widget.
- Step 2. Choose some telemetry data.
- Step 3. Write some logic with custom translation. See the example below.
- Step 4. Check the result in the HTML Value Card.

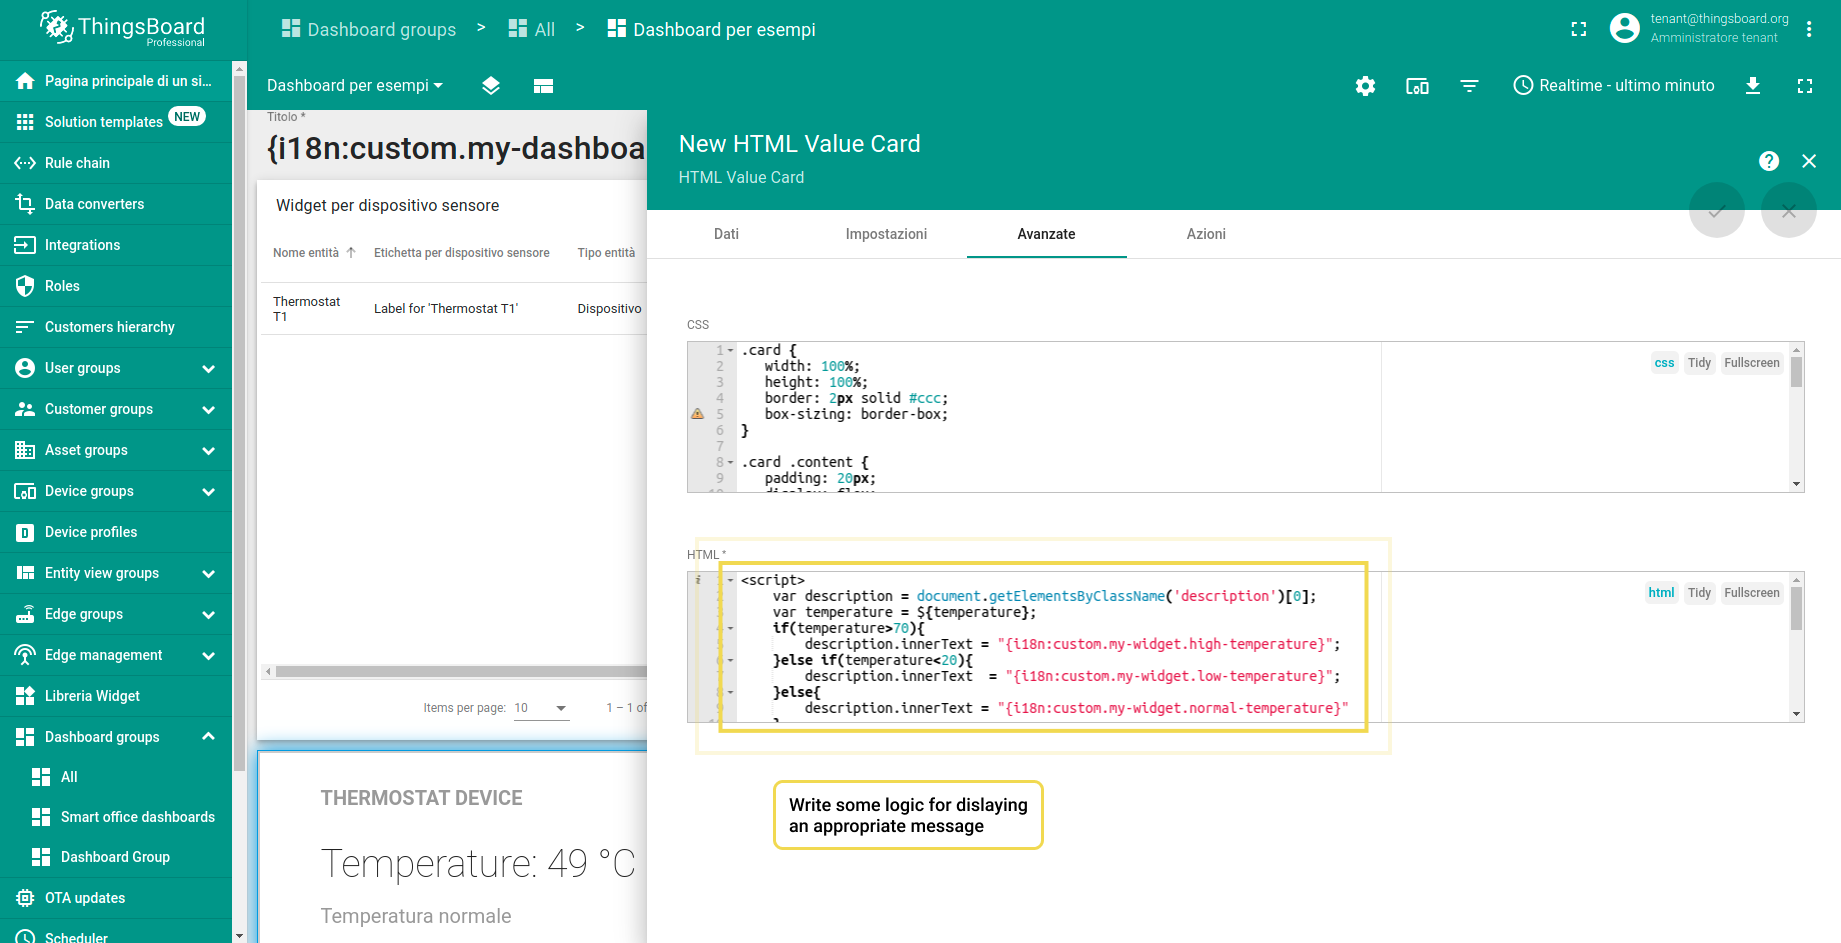
Examples of using custom translation in the HTML Vale Card:
1
2
3
4
5
6
7
8
9
10
11
12
13
14
15
16
17
18
19
20
21
22
23
24
25
26
<script>
    var description = document.getElementsByClassName('description')[0];
    var temperature = ${temperature};
    if(temperature>70){
        description.innerText = "{i18n:custom.my-widget.high-temperature}";
    }else if(temperature<20){
        description.innerText  = "{i18n:custom.my-widget.low-temperature}";
    }else{
        description.innerText = "{i18n:custom.my-widget.normal-temperature}"
    }

</script>

<div class='card'>
    <div class='content'>
        <div class='column'>
            <h1>Thermostat Device</h1>
            <div class='value'>
                Temperature: ${temperature:0} °C
            </div>
            <div class='description'>
            </div>
        </div>
        <img height="80px" src="http://icons.iconarchive.com/icons/iconsmind/outline/512/Temperature-icon.png" alt="Temperature icon">
    </div>
</div>
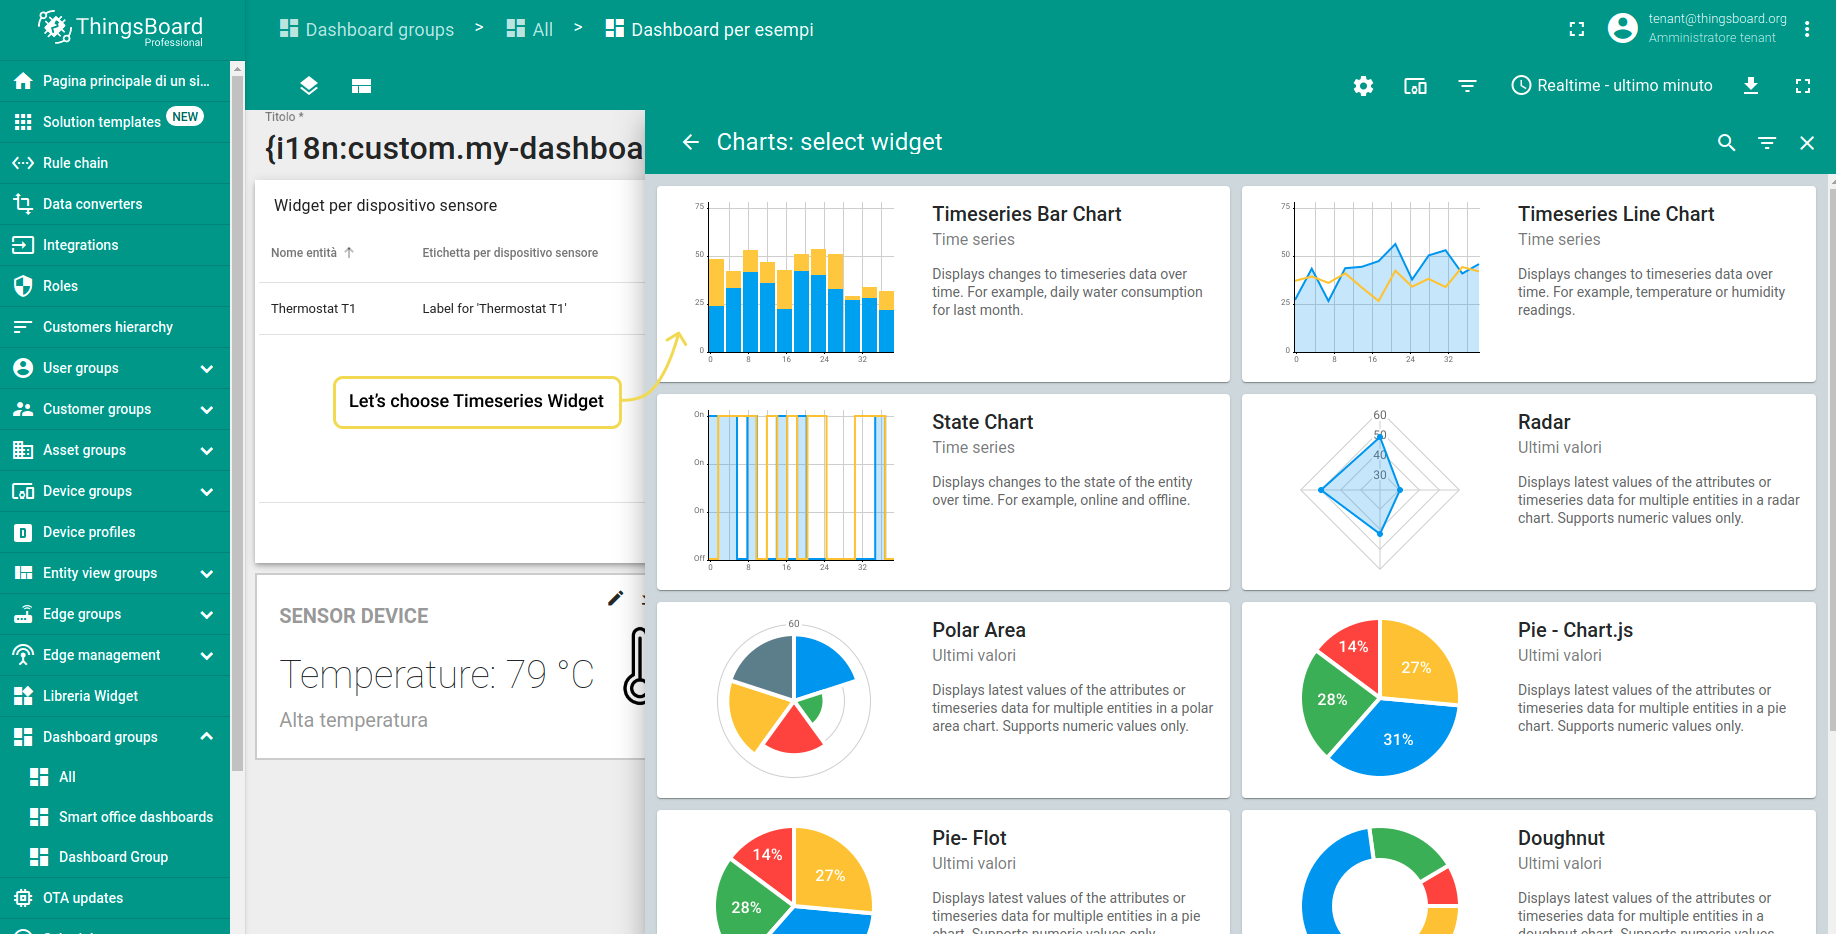
Other places
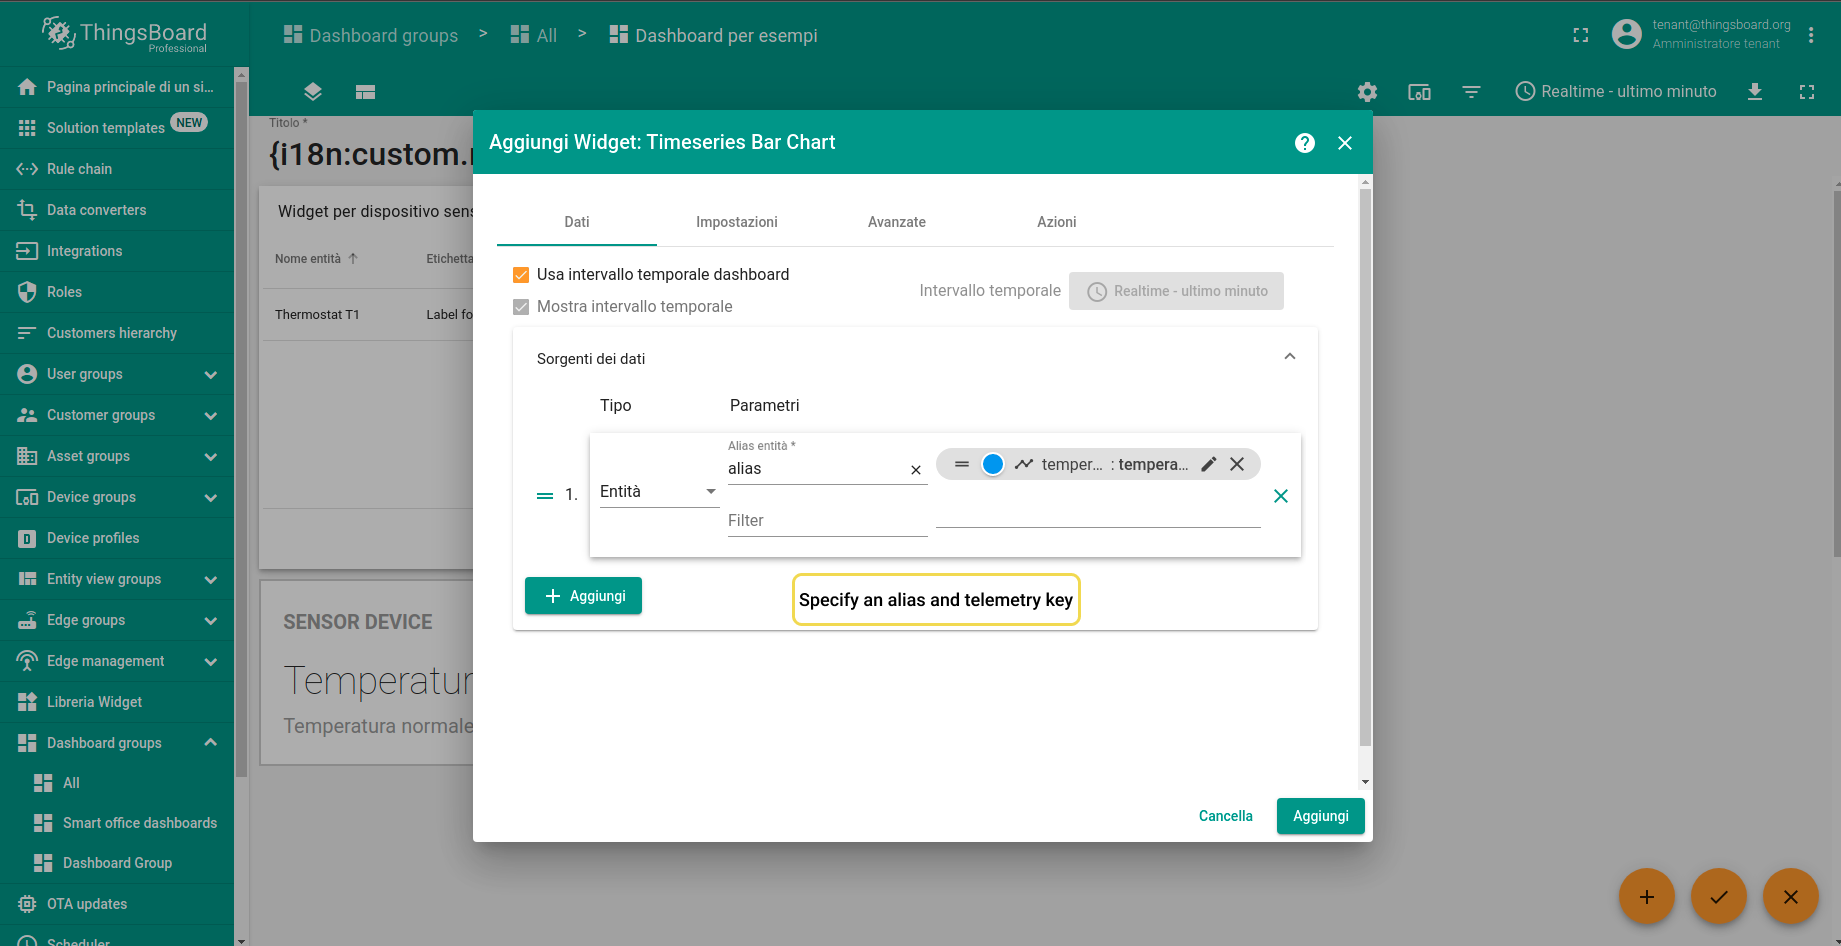
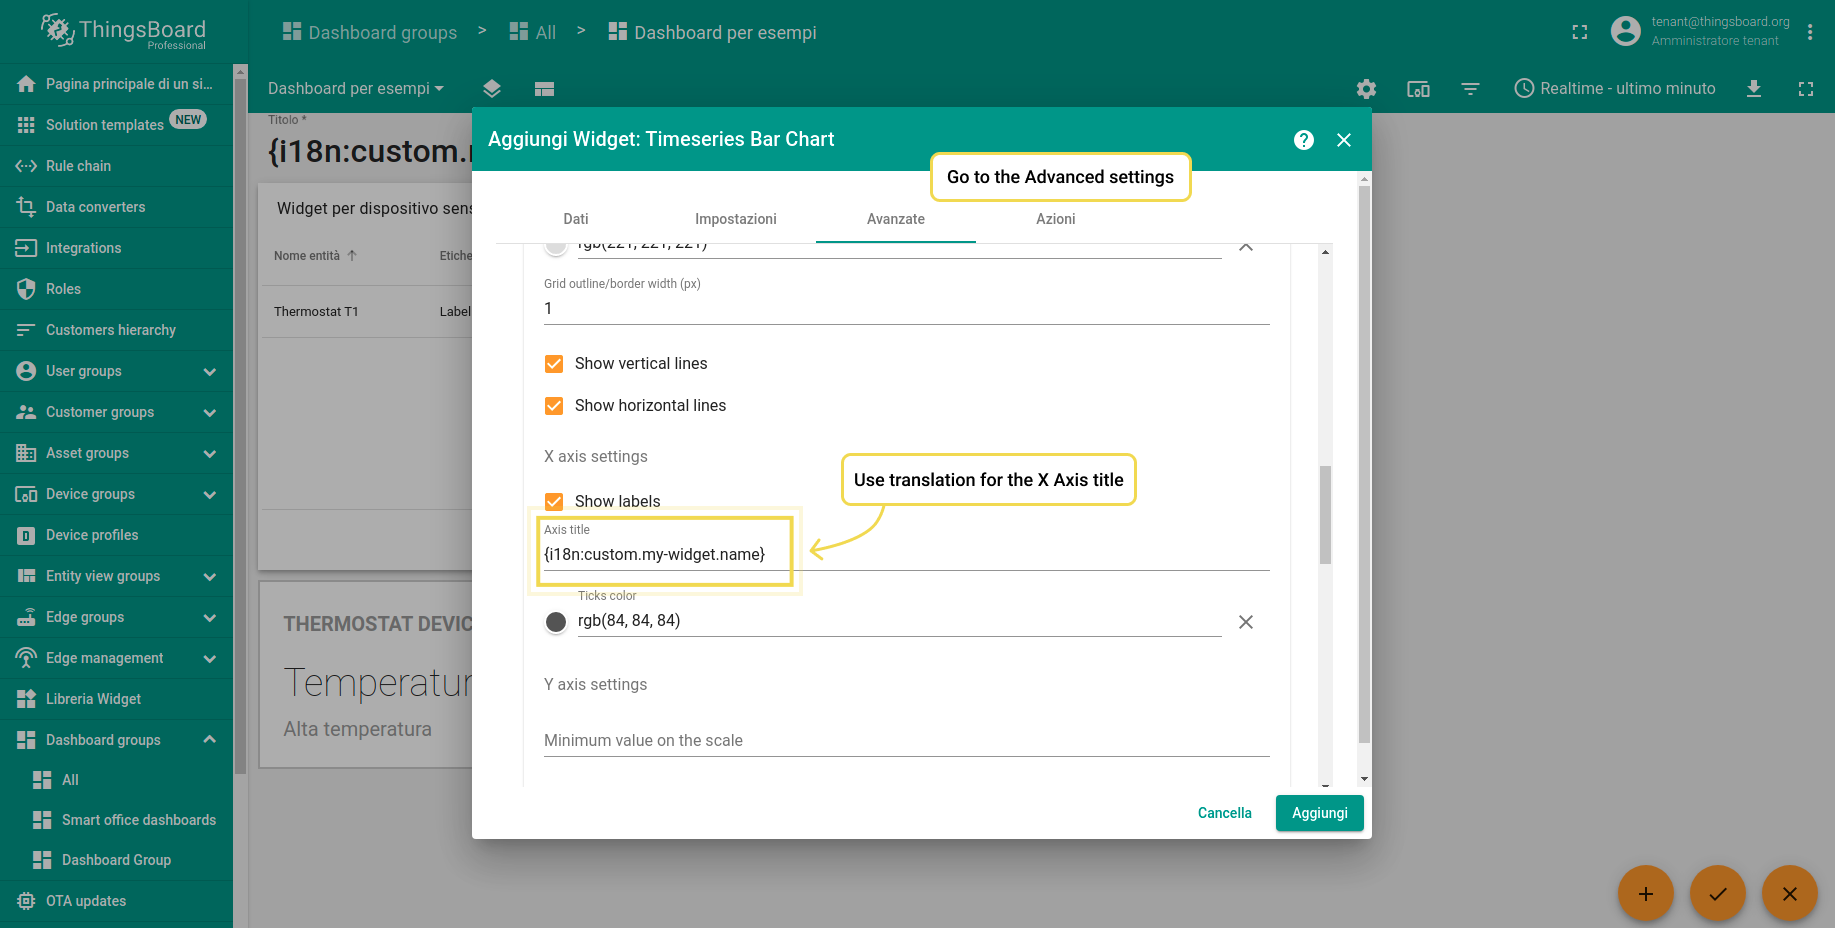
- Step 1. Choose a Timeseries Bar Chart.
- Step 2. Specify an alias and telemetry key.
- Step 3. Open Advanced tab and set translation for the X axis title - {i18n:custom.my-widget.name}. Save all settings.
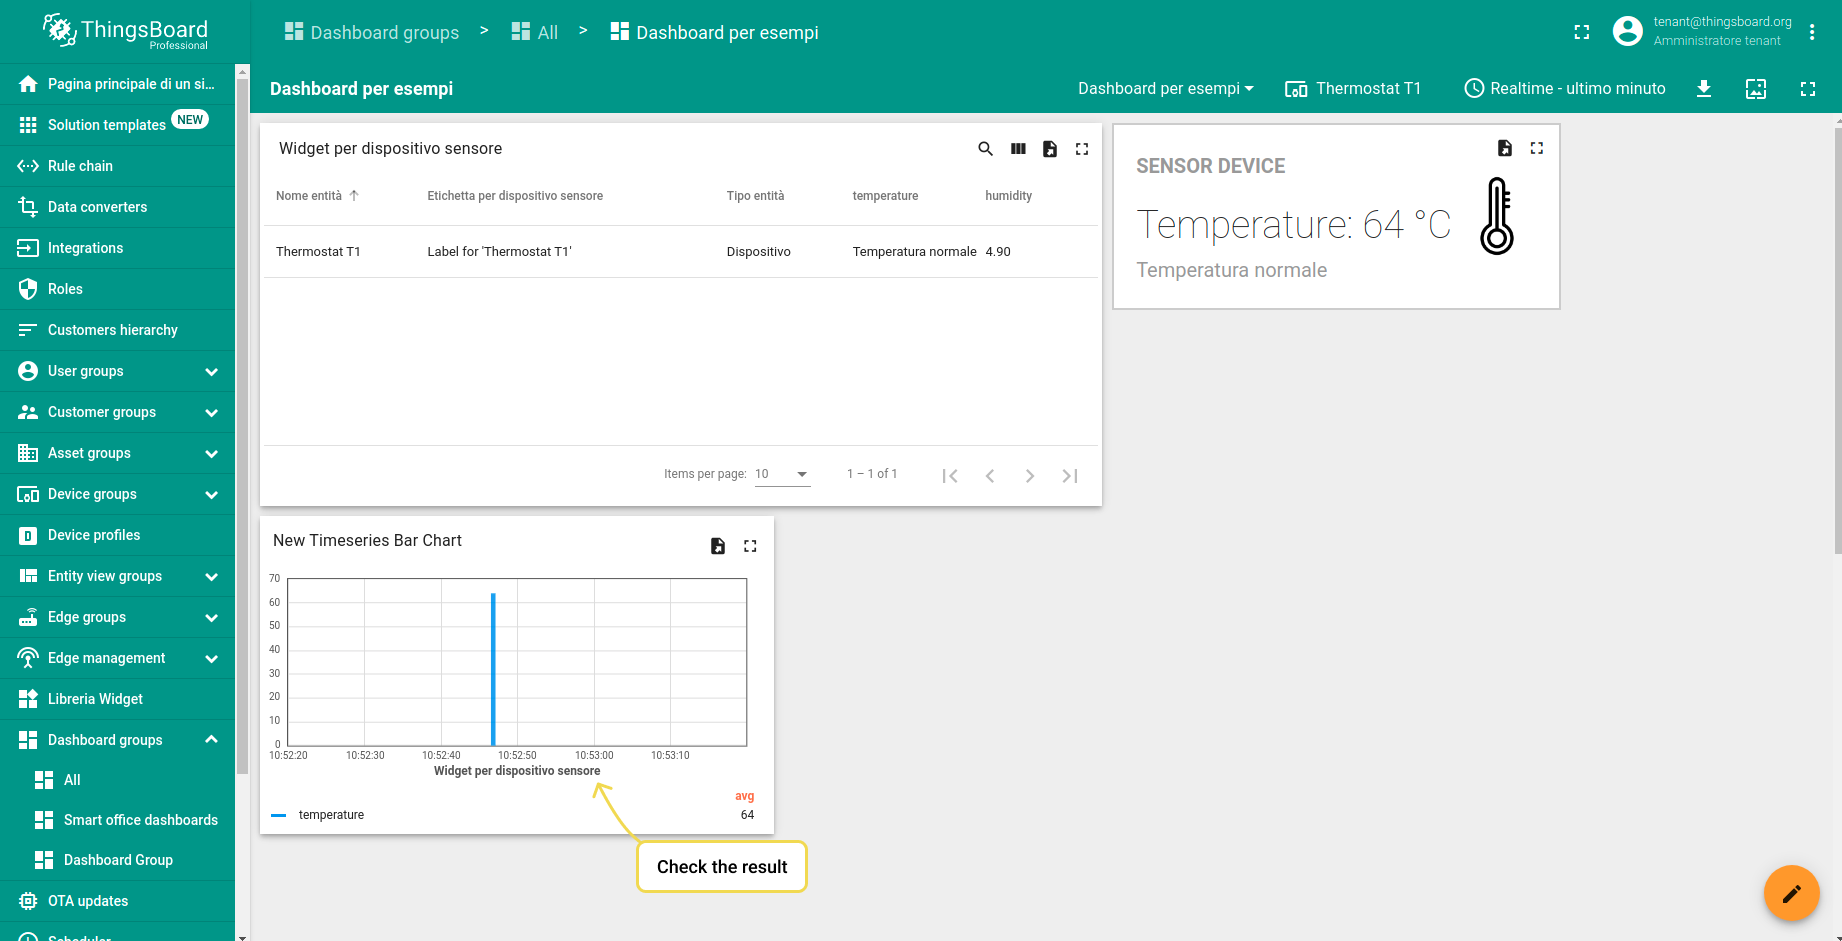
- Step 4. View translated X axis title.
For now, Custom Translation is not available in the HTML Card, Control Widgets, Files widgets, Date widget, Gateways widgets, Scheduling widgets.
Video Tutorial
See video tutorial below for step-by-step instruction how to use this feature.
Next steps
-
Getting started guides - These guides provide quick overview of main ThingsBoard features. Designed to be completed in 15-30 minutes.
-
Installation guides - Learn how to set up ThingsBoard on various available operating systems.
-
Connect your device - Learn how to connect devices based on your connectivity technology or solution.
-
Data visualization - These guides contain instructions on how to configure complex ThingsBoard dashboards.
-
Data processing & actions - Learn how to use ThingsBoard Rule Engine.
-
IoT Data analytics - Learn how to use rule engine to perform basic analytics tasks.
-
Hardware samples - Learn how to connect various hardware platforms to ThingsBoard.